Home Blog Page 3

10 Unique Diwali Sweets You Can Make in Under 30 Minutes | Quick & Easy Festive Recipes

0

Diwali—the festival of lights—is incomplete without sweets. The aroma of ghee, the sparkle of diyas, and the laughter of loved ones all come together to create memories that linger far beyond the festive season. But let’s be honest: not everyone has the time or patience to spend hours stirring kheer or shaping perfect laddoos. Between cleaning, decorating, and hosting guests, time becomes the rarest luxury.

That’s where this guide steps in! Imagine whipping up decadent Diwali sweets in just 30 minutes or less—without compromising on flavor, aroma, or authenticity. From rose-kissed coconut ladoos to indulgent gulab jamun truffles, these recipes are designed for modern kitchens and busy lives. Each sweet here is not just quick—it’s unique, memorable, and guaranteed to impress.

Whether you’re a kitchen pro or a last-minute cook, these easy sweets will bring that festive magic to your home, minus the stress. Let’s dive into the world of instant Diwali desserts that taste just as divine as the traditional ones!

Why Quick Sweets Are Perfect for Diwali

The Hustle of Diwali Preparations

The weeks leading up to Diwali can feel like a marathon—shopping for gifts, setting up lights, cleaning every corner, and planning festive meals. With so many things on the checklist, spending hours cooking can seem overwhelming. Quick sweets come as a savior here!

They not only save time but also allow you to experiment with new flavors without worrying about complicated techniques. In today’s fast-paced world, we crave efficiency. So, having a set of reliable, 30-minute recipes makes it easier to enjoy the essence of Diwali—spreading happiness through sweetness—without exhaustion.

Think of it like this: the less time you spend in the kitchen, the more time you get to spend celebrating with your loved ones.

Balancing Taste, Time, and Tradition

Some might think “quick” means “compromise,” but that’s far from the truth. Modern Indian cooking has evolved beautifully, blending convenience with tradition. Using condensed milk instead of khoya, microwaving barfis instead of simmering for hours, or adding chocolate to age-old recipes doesn’t make them less festive—it makes them more exciting.

Diwali is about joy and creativity. By trying out these quick recipes, you’re not breaking tradition; you’re simply adding your own flavor to it. After all, what’s more traditional than sharing something sweet, made with love, even if it took you just half an hour?

1. Coconut Ladoo with a Twist of Rose Flavor

rose  dessert

Ingredients & Quick Method

Here’s a refreshing take on the classic coconut ladoo. The rose flavor gives it a delicate floral note that pairs perfectly with the richness of coconut.

Ingredients:

  • 2 cups desiccated coconut

  • 1 cup condensed milk

  • 1 tbsp rose syrup or 1 tsp rose essence

  • A few drops of pink food coloring (optional)

  • 2 tbsp ghee

  • Crushed pistachios for garnish

Quick Method:

  1. Heat ghee in a non-stick pan.

  2. Add desiccated coconut and lightly roast for 2 minutes.

  3. Stir in condensed milk and rose syrup. Mix well.

  4. Cook for 5–7 minutes until the mixture thickens and leaves the sides.

  5. Let it cool slightly, then shape into small ladoos.

  6. Roll in extra coconut and garnish with pistachios.

Your fragrant, melt-in-mouth rose coconut ladoos are ready in just 15 minutes!

Why It’s a Must-Try

The rose essence adds a luxurious, festive aroma while giving your sweets a soft pink hue—perfect for Diwali gifting. These ladoos not only look stunning but stay fresh for days, making them ideal for advance prep. Plus, they’re completely beginner-friendly, requiring minimal effort yet delivering maximum flavor.

2. Instant Gulab Jamun Truffles

diwali sweet

Ingredients & Preparation

Imagine your favorite gulab jamun reinvented into bite-sized chocolate truffles! These are not only quicker but also make a statement on your dessert table.

Ingredients:

  • 1 pack of readymade gulab jamun mix

  • 2 tbsp milk

  • 100g dark chocolate

  • 1 tbsp cream

  • Crushed nuts for coating

Method:

  1. Prepare the gulab jamun mix as per packet instructions, but shape them into tiny balls.

  2. Fry until golden brown and soak lightly in sugar syrup.

  3. Melt dark chocolate with cream and mix until glossy.

  4. Coat the jamuns in melted chocolate and roll in crushed nuts.

  5. Chill for 10–15 minutes before serving.

Serving Tips

These truffles are a fusion masterpiece! Serve them in mini paper cups or gift boxes lined with gold foil. You can even drizzle white chocolate for a contrasting look. They make perfect bite-sized sweets for guests who love something traditional with a twist.

3. Chocolate Besan Barfi

diwali sweets or desserts

Ingredients & Cooking Method

Chocolate and besan—two beloved ingredients—come together in this modern take on the classic Indian barfi.

Ingredients:

  • 1 cup gram flour (besan)

  • ½ cup ghee

  • ¾ cup sugar

  • 2 tbsp cocoa powder

  • ½ cup milk powder

  • Chopped almonds or walnuts

Method:

  1. Heat ghee in a pan and roast besan until aromatic and golden brown.

  2. Add milk powder and sugar. Mix continuously.

  3. Stir in cocoa powder and continue cooking until it thickens.

  4. Pour into a greased tray, flatten, and top with nuts.

  5. Let it set for 20 minutes, then cut into squares.

Creative Variations

Try adding a dash of coffee powder for a mocha twist or layer it with plain besan mixture for a dual-tone look. This barfi sets quickly and tastes like Indian fudge with a hint of chocolate richness. It’s perfect for kids and adults alike!

4. Dry Fruit and Dates Rolls

sweets or desserts

Ingredients & Quick Steps

Packed with natural sweetness and energy, these rolls are a guilt-free Diwali treat.

Ingredients:

  • 1 cup dates (seedless)

  • ¼ cup almonds

  • ¼ cup cashews

  • 1 tbsp ghee

  • Desiccated coconut for coating

Steps:

  1. Chop dates and dry fruits finely or pulse them in a mixer.

  2. Heat ghee in a pan, add the mixture, and sauté for 3–4 minutes.

  3. Shape into logs and roll in desiccated coconut.

  4. Chill for 10 minutes and slice into discs.

Health Benefits & Storage Tips

These rolls are rich in iron, fiber, and natural sugars—perfect for festive energy. Store them in airtight containers; they last for up to two weeks without refrigeration.

5. Malai Peda with Saffron Essence

sweets or desserts

Quick Ingredients

Ingredients:

  • 1 cup milk powder

  • ½ cup condensed milk

  • 2 tbsp ghee

  • A few saffron strands soaked in warm milk

  • Cardamom powder

Pro Tips for Perfection

  1. Mix milk powder, condensed milk, and ghee in a pan.

  2. Cook on low heat till the mixture thickens and leaves the sides.

  3. Add saffron milk and cardamom powder.

  4. Shape into pedas and garnish with almonds.

Soft, aromatic, and absolutely divine—these pedas melt in your mouth and can be made in under 20 minutes!

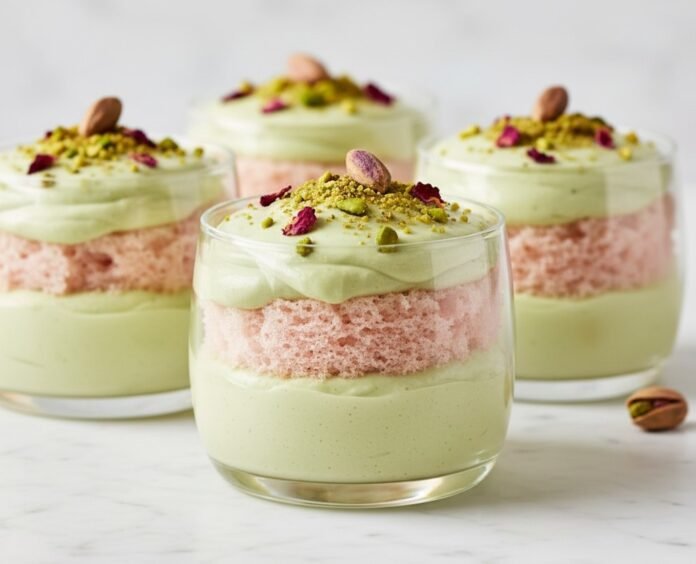
6. Instant Rasmalai Cups

dessert

Ingredients & Preparation

Who doesn’t love rasmalai? But making it from scratch takes hours. This instant version gives you the same creamy, saffron-flavored delight in under 25 minutes!

Ingredients:

  • 6 mini rasgullas (store-bought or homemade)

  • 1½ cups full cream milk

  • 3 tbsp condensed milk

  • A pinch of saffron soaked in warm milk

  • ¼ tsp cardamom powder

  • Chopped pistachios and almonds for garnish

Quick Method:

  1. Heat milk in a pan until it slightly reduces.

  2. Stir in condensed milk, saffron milk, and cardamom powder.

  3. Squeeze the syrup out of rasgullas gently and place them in small dessert cups.

  4. Pour the thickened milk over them.

  5. Chill for 15 minutes before serving.

Why It’s Perfect for Diwali

These mini rasmalai cups are not just delicious—they’re visually stunning. They add a festive elegance to your dessert table and can be served individually, reducing mess. The creamy milk infused with saffron makes each bite heavenly. You can even make them the night before and chill until your guests arrive.

7. Mango Sandesh Delight

mango dessert

Ingredients & Quick Steps

A Bengali classic with a tropical twist! This no-cook dessert combines the richness of paneer with the sweetness of mango pulp.

Ingredients:

  • 1 cup fresh paneer (crumbled)

  • 3 tbsp mango pulp

  • 2 tbsp powdered sugar

  • A pinch of cardamom powder

  • Chopped pistachios for garnish

Steps:

  1. Blend paneer, mango pulp, and sugar in a blender until smooth.

  2. Mix in cardamom powder.

  3. Shape into small round pieces or press into molds.

  4. Garnish with pistachios and refrigerate for 15 minutes.

Serving Suggestion

Serve chilled with a drizzle of mango pulp on top. The tangy-sweet flavor of mango beautifully complements the creamy texture of paneer, creating a refreshing dessert perfect for warm Diwali evenings. It’s light, vibrant, and bursting with festive color!

8. Instant Rava Kesari Cups

rava recipe

Ingredients & Method

A South Indian favorite made effortlessly in just 15 minutes!

Ingredients:

  • ½ cup semolina (rava)

  • 2 tbsp ghee

  • ¾ cup sugar

  • 1½ cups water

  • A few saffron strands

  • Cardamom powder and cashews

Quick Method:

  1. Heat ghee in a pan and roast rava until aromatic.

  2. In another pan, boil water with saffron and sugar.

  3. Slowly pour this syrup into the roasted rava, stirring continuously.

  4. Add cardamom powder and roasted cashews.

  5. Spoon into small serving cups and let it cool.

Flavor Variations

You can infuse orange zest or rose essence for unique versions. For a colorful twist, divide the mixture into two parts and add food color—yellow and pink. This adds a cheerful, festive touch to your Diwali spread!

9. Peanut Chikki Bites

peanut

Ingredients & Method

If you’re craving something crunchy, nutty, and sweet—peanut chikki bites are your go-to! This Indian brittle takes barely 10 minutes to make.

Ingredients:

  • 1 cup roasted peanuts

  • ¾ cup jaggery (grated)

  • 1 tbsp ghee

Method:

  1. Heat jaggery and ghee in a pan until it melts and starts bubbling.

  2. Add peanuts and mix quickly.

  3. Spread the mixture on a greased plate and flatten it.

  4. Let it cool slightly before cutting into bite-sized squares.

Health and Taste Factor

Unlike most sweets, peanut chikki is packed with protein and iron, making it a guilt-free indulgence. You can even wrap individual squares in foil for gifting. Add sesame seeds or coconut flakes for an extra crunch!

10. Instant Kesar Kalakand

milk desserts

Ingredients & Preparation

Kalakand is a beloved Diwali sweet, but it often requires hours of slow cooking. Here’s a microwave version that’s done in 10 minutes flat!

Ingredients:

  • 1 cup ricotta cheese or paneer

  • ½ cup condensed milk

  • 1 tbsp ghee

  • A few saffron strands

  • Cardamom powder

  • Chopped nuts

Steps:

  1. Combine ricotta cheese, condensed milk, and ghee in a microwave-safe bowl.

  2. Microwave for 4 minutes, stirring every minute.

  3. Add saffron and cardamom powder. Microwave for another 2 minutes.

  4. Spread in a greased dish, cool, and garnish with nuts.

  5. Cut into squares and serve.

Why It’s a Showstopper

The texture is soft, grainy, and perfectly sweet. The saffron lends a royal touch, making this dish look as luxurious as it tastes. Plus, it’s almost foolproof—even first-time cooks can nail it.

Tricks to Make Sweets Faster Without Compromising Taste

Using Instant Ingredients Smartly

Instant ingredients can be lifesavers during Diwali chaos. Here’s how to use them effectively:

  • Condensed milk replaces khoya or mawa effortlessly.

  • Milk powder adds creaminess without reducing milk for hours.

  • Microwave cooking speeds up setting time for barfis and pedas.

  • Pre-roasted flours and nuts save time and still deliver rich flavors.

The secret lies in combining convenience with creativity—mixing traditional elements like ghee and cardamom with modern shortcuts to achieve the same depth of flavor.

Smart Storage and Pre-prep Ideas

Plan your sweet-making schedule ahead of time:

  • Prepare dry mixtures (like roasted flour or chopped nuts) a day early.

  • Store sweets like ladoos or chikkis in airtight containers.

  • Use cupcake liners to portion sweets neatly.

  • Refrigerate milk-based sweets but serve at room temperature for best flavor.

When managed wisely, even a busy Diwali week can feel effortless and enjoyable!

Presentation Ideas for Your Diwali Sweets

How to Plate Like a Pro

The magic isn’t just in taste—it’s in the presentation. Arrange sweets on brass trays, decorate with rose petals, and sprinkle some edible silver leaf for that royal Diwali charm. Pair contrasting colors—like white pedas beside golden barfis—for a visually pleasing spread.

Gifting Ideas and Wrapping Hacks

Homemade sweets make the best Diwali gifts! Use mason jars, small boxes, or eco-friendly paper wraps. Line the containers with butter paper, tie them with golden ribbons, and attach personalized tags. You can even mix a few varieties into one box for a gourmet touch.

Conclusion: Sweetening Your Diwali Moments

Diwali is more than lights and fireworks—it’s about sweetness shared with love. These quick, unique sweets let you celebrate without stress, proving that great taste doesn’t always demand hours in the kitchen. Whether it’s rose coconut ladoos or instant kalakand, each recipe brings joy, color, and tradition together beautifully.

So, light your diyas, play your favorite music, and let the aroma of ghee and cardamom fill your home. After all, happiness is homemade—and sometimes, it only takes 30 minutes to make.

FAQs

1. What are some quick substitutes for condensed milk?
You can use thickened sweetened milk or milk powder mixed with sugar for similar consistency.

2. How can I make my sweets last longer?
Store them in airtight containers, and refrigerate milk-based ones. Use clean, dry spoons to prevent spoilage.

3. Can I make these sweets without ghee?
Yes! Substitute with butter or coconut oil, though ghee adds the traditional aroma.

4. What’s the best way to store coconut-based sweets?
Keep them refrigerated in an airtight box; they stay fresh for up to a week.

5. Which sweet is ideal for gifting during Diwali?
Dry fruit rolls and peanut chikki bites travel well and stay fresh longer, making them perfect gifts.

Kolhapuri Mutton Recipe | A Spicy Maharashtrian Delight

0
Authentic Kolhapuri Mutton Curry

Maharashtra is a land where food doesn’t just fill your stomach—it fills your soul. And if there’s one dish that embodies this spicy, hearty spirit in full glory, it’s the Kolhapuri Mutton Curry. More than just a spicy mutton dish, Kolhapuri Mutton is a symbol of tradition, celebration, and culinary courage. It’s not for the timid eater; it’s bold, rustic, full of character, and unapologetically fiery.

Cooked with a deeply aromatic, handmade Kolhapuri masala, slow-roasted spices, and tender cuts of goat meat, this dish is a royal affair served up in earthy kitchens across western India. It has earned its place among India’s most iconic regional curries.

So, tie on your apron, sharpen your knives, and get ready to take a spicy deep dive into the world of authentic Kolhapuri Mutton.

The Fiery Origins of Kolhapuri Cuisine

Kolhapur’s culinary style evolved through centuries of royal feasts, local harvests, and warrior appetites. The region was once ruled by the Maratha royalty who enjoyed meat-heavy diets. Their love for bold flavors shaped the use of locally available ingredients like dry coconut, fiery red chilies, and native aromatic spices.

Legend has it that Kolhapuri warriors would often demand “rassa” (spicy curry) to refuel after intense wrestling bouts. Thus, dishes like Tambda Rassa (red curry) and Pandhra Rassa (white curry) were born—both commonly served alongside Kolhapuri mutton.

It’s not just food. It’s history simmered in a pot.

What Really Sets Kolhapuri Mutton Apart?

You might be wondering—what makes Kolhapuri mutton so different from other mutton curries in India?

1. The Signature Masala

At the heart of this dish is the Kolhapuri masala, an exquisite blend of 35+ spices in some traditional recipes. Unlike garam masala or curry powder, it combines dry-roasted coconut, sesame seeds, poppy seeds, and a large variety of toasted spices—creating a flavor base that’s smoky, nutty, and complex.

2. The Use of Byadgi and Lavangi Chilies

These aren’t your average supermarket chilies. Byadgi gives color, while Lavangi (Kolhapuri’s signature chili) brings the heat. The combination makes this curry both vibrantly red and powerfully spicy.

3. Slow Cooking

Traditionally, the mutton is simmered slowly over coal stoves or wood fires, allowing the meat to soak up all the masala’s richness.

Ingredient Breakdown: What You Need and Why

Let’s go deeper into what each ingredient does.

The Mutton

  • Type: Bone-in goat meat is best.

  • Cuts: Shoulder and leg pieces, for flavor and tenderness.

  • Why bone-in? Bones enrich the gravy with collagen and depth.

Spices & Whole Seeds

  • Coriander seeds: Adds citrusy base notes.

  • Fennel seeds: Slight sweetness to balance the heat.

  • Cloves, cinnamon, black cardamom: Warmth and richness.

  • Bay leaf & star anise: Subtle floral notes.

  • Black pepper: Underlying spicy buzz.

  • Lavangi chili or Guntur chili: For bold, authentic heat.

  • Byadgi chili: Mild heat but stunning red color.

Roasted Coconut Base

  • Grated dry coconut: Adds body and texture.

  • White poppy seeds: Natural thickener and slight sweetness.

  • Sesame seeds: Nutty, slightly bitter flavor.

  • Garlic, ginger, onion (roasted): Intensifies the earthy backbone.

Where to Source Authentic Kolhapuri Ingredients

If you’re not in Maharashtra, sourcing Kolhapuri ingredients may seem tricky, but here’s how you can manage:

  • Online spice stores: Websites like SpicesofIndia, Amazon, and local Indian grocers often stock Kolhapuri masala or Lavangi chilies.

  • Indian grocery stores: Look for “Kolhapuri Masala” packets, but always check for ingredient quality—some brands dilute the real deal.

  • Make your own: Honestly, a homemade masala tastes far better than store-bought.

kolhapuri mutton

Let’s Cook: Step-by-Step Kolhapuri Mutton Recipe

Ingredients (Serves 4–5):

For the Mutton:

  • 500g bone-in goat meat (preferably shoulder)

  • 1 tsp turmeric

  • Salt to taste

  • 2 tbsp ginger-garlic paste

For Kolhapuri Masala:

  • 2 tbsp dry grated coconut

  • 1 tbsp poppy seeds

  • 1 tbsp sesame seeds

  • 6–8 dry red Byadgi chilies

  • 4 dry Lavangi or Guntur chilies (adjust for heat)

  • 1 tbsp coriander seeds

  • 1 tsp cumin seeds

  • 1 tsp fennel seeds

  • 4 cloves

  • 1-inch cinnamon stick

  • 2 black cardamoms

  • 4–5 black peppercorns

  • 1 star anise

  • 2 garlic cloves

  • 1-inch ginger piece

  • 1 medium onion (thinly sliced)

For Curry:

  • 2 large onions, finely chopped

  • 2 tomatoes, finely chopped

  • 4 tbsp oil (groundnut or sunflower)

  • Fresh coriander for garnish

  • 1 tsp garam masala (optional)

Instructions

Step 1: Marinate the Mutton

  • Wash and clean the mutton thoroughly.

  • Marinate with salt, turmeric, and ginger-garlic paste.

  • Let it sit for 30–60 minutes.

Step 2: Roast the Masala

  • In a dry pan, roast the coconut until golden brown. Set aside.

  • Roast poppy and sesame seeds until they pop.

  • Roast dry chilies until they become crisp.

  • Roast the whole spices until fragrant.

  • Roast onion slices, garlic, and ginger until caramelized.

  • Combine all the above and grind into a thick paste with water.

Step 3: Cook the Base Curry

  1. Heat oil in a thick-bottomed kadhai.

  2. Add chopped onions, sauté until golden brown.

  3. Add tomatoes, cook until they break down completely.

  4. Add the freshly ground Kolhapuri masala paste.

  5. Cook until oil begins to separate.

Step 4: Add Mutton and Simmer

  1. Add marinated mutton to the masala base.

  2. Stir to coat each piece with the masala.

  3. Add water (around 2–2.5 cups).

  4. Cover and simmer for 45–60 minutes, stirring occasionally.

  5. Optionally, pressure cook for 4–5 whistles.

Step 5: Final Touch

  • Add garam masala and fresh coriander.

  • Simmer uncovered for 5 more minutes.

  • Let it rest before serving.

What to Serve with Kolhapuri Mutton

Traditional Sides

  • Jowar Bhakri (Sorghum flatbread)

  • Steamed Rice

  • Pandhra Rassa (white mutton broth made with coconut milk)

  • Tambda Rassa (extra red curry to pour over rice)

Cooling Sides

  • Sol Kadhi (Kokum and coconut milk drink)

  • Cucumber raita

  • Onion-lime salad

Modern Twists

  • Serve as a mutton taco filling for fusion fans.

  • Pair it with herbed couscous or quinoa for a healthy twist.

  • Use as a spicy soup base with rice noodles.

Regional Myths and Anecdotes

In Kolhapur, there’s a saying:

“If your tongue isn’t tingling and your forehead isn’t sweating, it’s not Kolhapuri enough.”

There are homes where Kolhapuri Mutton is served every Sunday like clockwork. It’s a dish that binds generations—grandmothers teach their daughters, who pass it to theirs. It’s not just a meal. It’s a ritual.

Some local families also believe that offering Kolhapuri mutton during festivals brings prosperity—especially when served with jaggery and bhakri.

Storage & Meal Prep Tips

  • Fridge: Store up to 3 days in an airtight container.

  • Freezer: Freeze masala separately or full curry up to 1 month.

  • Reheating: Always heat on low, adding a splash of hot water to loosen the gravy.

Curry tastes even better the next day—spices settle and deepen in flavor.

Chef Tips & Secrets

  • Always cook masala till oil separates—it ensures no raw spice taste.

  • Don’t skimp on oil. Kolhapuri curries thrive on that glossy layer on top.

  • Add a pinch of jaggery to balance excessive heat without changing flavor.

Common Mistakes to Avoid

  • Using lean mutton cuts – They dry out easily. Use shoulder or leg pieces.

  • Rushing the simmer – Flavor comes from time. Let it slow cook.

  • Using too many tomatoes – It can overpower the spice profile.

  • Skipping the masala roasting – Raw spices = raw curry.

Why You Must Try This At Least Once

In a world full of bland curries and quick hacks, Kolhapuri Mutton stands tall—bold, rich, spicy, and loaded with authenticity. It’s a dish for those who love food with a story, a backbone, and a fire in its belly. Whether you’re Maharashtrian or just a spice-curious foodie, this dish promises a punch in every bite.

Cook it once, and you’ll have a new weekend ritual.

Conclusion

Kolhapuri Mutton isn’t just a spicy curry—it’s a slice of Maharashtra’s culinary heritage. Each bite tells a story of bold flavors, time-honored techniques, and the love of generations. Yes, it takes time. Yes, it demands attention. But once you master this dish, you’ll realize that good food isn’t just about feeding—it’s about feeling.

So go ahead. Light up that stove, grind that masala, and let the aroma of Kolhapur fill your kitchen.

Nutrient Amount
Calories 420–470 kcal
Protein 28–32g
Fat 30–35g
Carbohydrates 8–12g
Fiber 3g

FAQs

1. Can I use lamb instead of goat meat?

Yes! Lamb works well, especially shoulder cuts. The cooking time might vary slightly based on tenderness.

2. How spicy is Kolhapuri Mutton really?

Traditionally, it’s very spicy. But you can always control heat by reducing the number of chilies or adding coconut milk.

3. Can this dish be made in an Instant Pot or pressure cooker?

Absolutely. You can sauté the masala in the pot and pressure cook for 4–5 whistles or set the Instant Pot to “Meat Stew” mode for 35 minutes.

4. Is it gluten-free?

Yes. This curry is naturally gluten-free. Just make sure your store-bought masalas (if used) don’t contain additives.

5. Can I make it vegetarian?

Surprisingly, yes! Use soya chunks, jackfruit, or mushrooms with the same masala base for a fiery vegetarian version.

Vegan No-Bake Cranberry Orange Coconut Bars

0
vegan Cranberry Orange Coconut Bars

There’s something about the combination of cranberries, oranges, and coconut that screams holiday magic and tropical escape all at once. Now imagine wrapping that flavor trio into a chewy, sweet, and slightly tart dessert bar — with zero baking required. That’s where these Vegan No-Bake Cranberry Orange Coconut Bars come in.

They’re vegan, gluten-free, refined sugar-free, and made with simple whole food ingredients — yet they taste like something you’d find at a fancy bakery. And the best part? They’re incredibly easy to make, requiring just a few steps and minimal equipment.

Whether you’re prepping healthy snacks, looking for holiday party ideas, or just craving a satisfying plant-based treat, these bars check every box.

Why You’ll Love These Bars

Let’s be real — it’s hard not to fall in love with a recipe that takes 20 minutes to prep, uses whole food ingredients, and doesn’t ask you to touch your oven. But in case you need more convincing, here’s why these vegan cranberry orange coconut bars are a must-try:

  • No-bake and perfect for warm weather or busy days

  • Made with natural, unprocessed ingredients

  • Deliciously balanced in flavor: creamy, tart, sweet, and citrusy

  • Kid-friendly, gluten-free, and refined sugar-free

  • Make-ahead and freezer-friendly — great for batch prep

The Inspiration Behind the Recipe

These bars were inspired by classic layered holiday desserts but with a healthier, plant-based twist. The vibrant cranberry-orange layer pays homage to traditional winter flavors, while the coconut base adds a tropical element that feels indulgent and comforting. It’s a fusion of festive nostalgia and modern wellness — and honestly, it’s a vibe.

vegan Cranberry Orange Coconut Bars

Ingredients You’ll Need (And Why They Work)

Here’s a breakdown of the wholesome ingredients that come together to create this dreamy no-bake treat:

For the Coconut Base:

  • Unsweetened Shredded Coconut (2 cups / 140g)

    • Adds texture, flavor, and healthy fats. Look for fine or medium shred.

  • Coconut Milk (¼ cup / 60g)

    • Binds and moistens the mixture while adding creamy richness.

  • Coconut Oil (3 tbsp / 45g)

    • Helps set the base once chilled and adds subtle coconut flavor.

  • Maple Syrup (4 tbsp / 80g)

    • A natural sweetener that blends easily and keeps things moist.

  • Vanilla Extract (½ tsp)

    • Brings depth and warmth to balance the tart topping.

  • Sea Salt (pinch)

    • Enhances the flavors and brings everything to life.

For the Cranberry Orange Sauce:

  • Fresh Cranberries (1 cup)

    • Packed with antioxidants, fiber, and bold tart flavor.

  • Water (¼ cup)

    • Used to simmer the cranberries and create the sauce.

  • Maple Syrup (⅓ cup)

    • Sweetens the sauce naturally and balances the cranberries’ acidity.

  • Orange Juice (4 tbsp)

    • Adds a juicy citrusy brightness. Use fresh-squeezed if possible.

  • Orange Zest (½ tsp)

    • Infuses aromatic oils that deepen the orange flavor.

  • Cinnamon (½ tsp)

    • Adds a warm, cozy note that complements the fruit beautifully.

  • Chia Seeds (2 tbsp)

    • Help thicken the sauce naturally and add plant-based protein + omega-3s.

Equipment Checklist

You don’t need fancy kitchen gear to make these bars. Here’s what you’ll need:

  • Food processor or high-speed blender

  • Small saucepan

  • 5×9-inch loaf pan (or similar size container)

  • Parchment paper

  • Mixing spoon and spatula

  • Zester or grater

Step-by-Step Instructions

Step 1: Make the Coconut Base

  1. In your food processor, add all the base ingredients: shredded coconut, coconut milk, coconut oil, maple syrup, vanilla extract, and a pinch of salt.

  2. Process for about 1 minute until the mixture is well-blended and sticky but not runny. It should hold together when pressed between your fingers.

  3. Line a 5×9 inch loaf pan with parchment paper, leaving overhang on the sides for easy removal later.

  4. Spoon the mixture into the pan and press it down firmly with a spatula or your hands to form an even layer.

  5. Place the pan in the freezer while you prepare the cranberry orange topping.

Step 2: Make the Cranberry Orange Sauce

  1. Rinse your cranberries and discard any shriveled ones.

  2. Add cranberries and ¼ cup water to a small saucepan. Bring to a gentle boil over medium-high heat.

  3. Reduce the heat to low and simmer for 5–10 minutes, stirring occasionally, until the cranberries burst and the mixture thickens.

  4. Remove from heat and stir in maple syrup, orange juice, orange zest, and cinnamon.

  5. Add the chia seeds last and stir thoroughly. These will absorb liquid and thicken the sauce further as it cools.

  6. Let the sauce rest at room temperature for 15–20 minutes, until slightly cooled and thickened.

Step 3: Assemble and Chill

  1. Pour the cranberry orange sauce over the chilled coconut base.

  2. Use a spatula or spoon to spread the topping evenly across the surface.

  3. Return the pan to the freezer and let the bars firm up for at least 1 hour.

Step 4: Slice and Enjoy

vegan Cranberry Orange Coconut Bars

Storage Tips


These bars are perfect for prepping ahead and storing for later.

  • Fridge: Store in an airtight container for up to 1 week.

  • Freezer: Freeze individually wrapped bars for up to 3 months. Let thaw for 5–10 minutes at room temperature before enjoying.

Recipe Variations

 Add Crunch

  • Mix in chopped walnuts, pecans, or pistachios to the base for extra crunch and protein.

 Chocolate Drizzle

  • Melt a few tablespoons of vegan dark chocolate and drizzle over the top before chilling. Fancy and delicious!

 Oat Base

  • Replace ½ cup of shredded coconut with rolled oats for a slightly firmer base.

 Berry Swap

  • Try this recipe with blueberries, raspberries, or a mix of berries for a fruity twist.

Serving Suggestions

  • As a breakfast bar with coffee or tea

  • As a healthy dessert after dinner

  • Cut into mini bites for a holiday party platter

  • Paired with citrus salad for a refreshing brunch combo

Troubleshooting Common Issues

Bars are too crumbly?

  • You may need more coconut oil or maple syrup in the base. Add 1 tsp at a time and reprocess.

Topping too runny?

  • Let the cranberry mixture cool longer so the chia seeds absorb more moisture. Or stir in an extra teaspoon of chia seeds.

Bars too firm to cut?

  • Let them sit at room temperature for 5–10 minutes before slicing.

Why These Bars Are a Win for Your Wellness

These bars aren’t just delicious — they’re also packed with nutrients that support your health:

  • Cranberries – loaded with antioxidants and gut-friendly fiber

  • Chia seeds – rich in omega-3s, protein, and digestive support

  • Coconut – provides healthy fats and keeps you full

  • Maple syrup – a natural sweetener with minerals like zinc and manganese

  • No refined sugars, flours, or artificial ingredients

These Vegan No-Bake Cranberry Orange Coconut Bars are proof that healthy desserts can be stunning, flavorful, and downright crave-worthy. With minimal effort and just a handful of whole food ingredients, you can whip up a treat that feels indulgent but supports your body at the same time.

They’re perfect for busy weekdays, cozy weekends, holiday gatherings, or anytime you want something special that doesn’t sacrifice health for taste.

So next time you’re craving something fruity, creamy, and satisfying, give these bars a try. We promise they’ll become a favorite in your plant-based recipe collection.

VEGAN cranberry orange coconut bars

FAQs

1. Can I make these without a food processor?

Yes, but you’ll need to chop everything very finely and mix thoroughly by hand. The texture will be a bit more rustic but still tasty.

2. Can I use frozen cranberries instead of fresh?

Absolutely. Just thaw them first and drain excess water before cooking.

3. Are these bars good for kids?

Totally! They’re naturally sweetened and free of common allergens — great for lunchboxes or after-school snacks.

4. Can I use another sweetener instead of maple syrup?

Yes. You can try agave, coconut nectar, or date syrup in equal amounts.

Virgin Piña Colada Recipe (Non-Alcoholic & Tropical Delight)

0
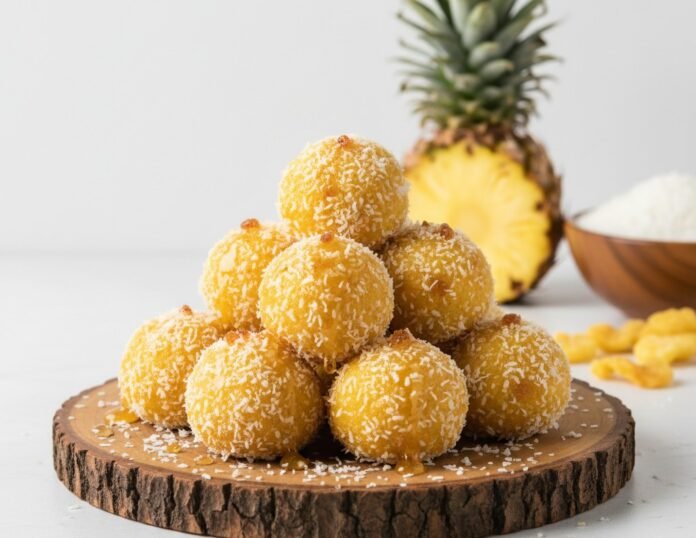
virgin pina colada

Let’s get one thing straight: just because it’s called “virgin” doesn’t mean it lacks flavor or fun. A virgin Piña Colada is simply the non-alcoholic version of the classic tropical cocktail. It retains all the rich, creamy, pineapple-coconut goodness you know and love—minus the rum. So whether you’re skipping alcohol for health reasons, personal preference, religious beliefs, or because you’re serving little ones, this drink delivers all the vacation vibes without the buzz.

The absence of alcohol doesn’t take anything away. In fact, many people prefer the virgin version because it’s lighter, more hydrating, and versatile enough to enjoy anytime—from brunch to backyard BBQs. Think of it as the smoothie version of a cocktail—tropical, creamy, cool, and 100% refreshing.

And let’s not forget: it’s Instagram-worthy. Whether you serve it in a chilled coconut, mason jar, or a classic hurricane glass with a tiny umbrella, a virgin Piña Colada screams paradise in a glass.

The Tropical Charm of a Non-Alcoholic Piña Colada

If you close your eyes and take a sip, you can almost hear the ocean waves. That’s the magic of a well-made virgin Piña Colada. It’s creamy but not heavy, sweet but balanced, and refreshingly cold. The mix of pineapple’s zesty brightness and coconut’s creamy depth creates a flavor combo that feels like a tropical escape—even if you’re just sitting on your porch or relaxing after work.

And here’s the kicker: everyone can enjoy it. From toddlers to grandparents, this is one of those rare drinks that’s universally loved. It’s perfect for birthday parties, baby showers, poolside afternoons, or just a sunny pick-me-up after a long day. Serve it once, and you’ll be asked to make it again—and again.

Origins of the Classic Cocktail

The Piña Colada, which means “strained pineapple” in Spanish, has Caribbean roots—most notably in Puerto Rico, where it’s considered the national drink. The first records of the drink date back to the 1950s, where bartenders were blending pineapple juice, coconut cream, and rum into what would become one of the world’s most iconic tropical cocktails.

There’s still debate about which bartender invented it first, but one thing’s for sure: the combination of pineapple and coconut was a game-changer. It took off in popularity thanks to its luscious texture and its ability to make anyone feel like they were on vacation, even if they were in the middle of a city.

Evolving into the Virgin Version

As with many beloved cocktails, the Piña Colada naturally evolved into a non-alcoholic version. The virgin Piña Colada became popular in family-friendly resorts, cruise ships, and restaurants that wanted to offer a tropical mocktail that everyone could enjoy.

Today, the virgin Piña Colada stands on its own. It’s no longer seen as just a substitute for the original—it’s become a drink in its own right, appreciated for its flavor, texture, and universal appeal.

Why Choose a Non-Alcoholic Piña Colada?

Perfect for All Ages

One of the biggest perks of a virgin Piña Colada is that absolutely anyone can enjoy it. Whether you’re hosting a party for kids, a pregnant friend, or someone who simply doesn’t drink, this mocktail ensures everyone has something festive and fancy in hand.

Kids especially love it because it feels like a “grown-up” drink—but it’s 100% safe. Plus, it’s a fun way to introduce little ones to tropical fruits like pineapple and coconut in a delicious, drinkable form.

Healthier Alternative to Boozy Beverages

Aside from being alcohol-free, a virgin Piña Colada can actually be a lot healthier than its alcoholic counterpart—especially if you make it at home. You can control the ingredients, skip the added sugars, and even sneak in healthy add-ins like chia seeds, Greek yogurt, or fresh fruit.

Here are some health-conscious tweaks:

  • Use fresh pineapple instead of juice for more fiber and fewer sugars.

  • Swap coconut cream with light coconut milk to cut calories.

  • Add a handful of ice or frozen fruit for natural thickness instead of syrups.

And the best part? You’ll still get that tropical taste and creamy texture—minus the hangover.

virgin pina colada

Ingredients for the Perfect Virgin Piña Colada

Core Ingredients You’ll Need

Creating a flawless virgin Piña Colada starts with simple, high-quality ingredients. Here’s your grocery list:

  • Pineapple Juice (100% Pure) – Brings the sweet and tangy tropical flavor.

  • Coconut Cream – Adds the rich, creamy body to the drink.

  • Ice – Crushed or cubed, it helps thicken and chill.

  • Optional: Fresh Pineapple Chunks – For extra texture and a fruitier taste.

  • Sweetener (Optional) – Honey, agave, or simple syrup if needed.

Pro Tip: Avoid using coconut milk or coconut water as the main creamy ingredient—they’re too thin. Coconut cream or cream of coconut gives the best thick, velvety consistency.

Optional Add-ins for Extra Flavor

Want to jazz things up? Try these add-ons:

  • Banana – Adds creaminess and natural sweetness.

  • Mango – Enhances the tropical vibe.

  • Vanilla Extract – Adds warmth.

  • Lime Juice – Balances the sweetness with a zing.

  • Shredded Coconut – For added texture.

You can tailor your Piña Colada to match your mood or what you have in your fridge. It’s that forgiving and flexible.

Tools and Equipment You’ll Need

Blending Essentials

To make your virgin Piña Colada smooth and dreamy, here’s what you’ll need:

  • High-Powered Blender – Essential for blending ice and thick ingredients.

  • Measuring Cups and Spoons – For precise proportions.

  • Ice Tray – Freeze pineapple chunks or coconut milk for added chill factor.

  • Mason Jars or Cocktail Glasses – For serving in style.

Make sure your blender is powerful enough to crush ice evenly. A weak blender will leave you with chunks, which ruins the smooth, frosty texture that makes this drink so iconic.

Presentation and Garnishing Tools

A big part of the Piña Colada’s appeal is how it looks. Here are some extras to enhance presentation:

  • Cocktail Umbrellas

  • Pineapple Wedges

  • Maraschino Cherries

  • Paper Straws

  • Coconut Shells or Pineapple Halves (for serving)

When it looks good, it tastes even better. Presentation turns an ordinary drink into a mini vacation.

Step-by-Step Virgin Piña Colada Recipe

Classic Creamy Version

Ready to create the ultimate tropical mocktail? Let’s dive into the classic creamy version of a virgin Piña Colada that’s as dreamy as the original—but without the alcohol.

Ingredients:

  • 1 cup pineapple juice (fresh or canned, 100% juice)

  • ½ cup coconut cream (or cream of coconut for a sweeter flavor)

  • 1 to 1½ cups ice cubes

  • ½ cup fresh pineapple chunks (optional, for more flavor)

  • 1 tablespoon honey or sugar (optional, depending on your sweetness preference)

Instructions:

  1. Add Ingredients to Blender: Pour the pineapple juice, coconut cream, ice cubes, and optional pineapple chunks into your blender. If you like it sweeter, add honey or sugar.

  2. Blend Until Smooth: Blend on high speed for 30–60 seconds until the drink is creamy and frothy. You shouldn’t see any ice chunks.

  3. Taste Test: Give it a sip. Too thick? Add a splash of pineapple juice. Too thin? Add a bit more ice or pineapple.

  4. Serve Immediately: Pour into a chilled glass. Garnish with a pineapple slice, maraschino cherry, or a little umbrella for flair.

This version is rich, smooth, and full of tropical flavor. It’s a real crowd-pleaser and incredibly simple to whip up in just 5 minutes.

Tips for the Best Taste and Texture

Choosing the Right Pineapple and Coconut Milk

The type of pineapple and coconut milk you use makes a huge difference in your drink’s flavor and creaminess.

  • Pineapple Juice: Fresh is best. If you have a juicer or blender, blend fresh pineapple chunks and strain the pulp. Canned juice works too but avoid “from concentrate” types that are loaded with sugar.

  • Coconut Cream vs. Coconut Milk: Coconut cream is thicker and richer, ideal for a creamy Piña Colada. Coconut milk is thinner and can work in frozen or lighter versions.

Pro tip: If you’re after a silky texture, use cream of coconut like Coco Lopez—it’s sweetened and ultra-smooth, perfect for that authentic flavor.

Balancing Sweetness and Consistency

Not all pineapples are created equal. Some are sweet and ripe, others are more tart. Always taste your juice first.

If it’s too tangy, you can:

  • Add a little honey or maple syrup.

  • Use cream of coconut instead of unsweetened coconut milk.

If your drink is too watery:

  • Add more ice or frozen fruit.

  • Use less juice or thinner liquids.

If it’s too thick:

  • Add a splash of juice or coconut water.

It’s all about balance—don’t be afraid to tweak until it’s just right.

Garnishing and Serving Ideas

Presentation Tips for Maximum Wow Factor

You eat (and drink) with your eyes first, right? So let’s make your Piña Colada look as good as it tastes.

Here are a few ways to level up your drink’s presentation:

  • Serve in unique glassware: Hurricane glasses, tiki mugs, mason jars, or even hollowed-out pineapples or coconuts.

  • Chill your glass: Pop it in the freezer for 15 minutes before serving for a frosty touch.

  • Add fun straws or umbrellas: It adds instant tropical charm.

Trust us—people will take photos before they even take a sip.

Fun Garnish Options Kids and Adults Love

Garnishes don’t just look pretty—they add aroma, flavor, and personality.

Try these:

  • Pineapple wedges or spears

  • Maraschino cherries

  • Toasted coconut flakes

  • Fresh mint sprigs

  • Fruit skewers (pineapple, strawberry, kiwi)

Kids especially love drinks that look fancy. Add a twisty straw, a fun umbrella, and they’ll feel like they’re on a mini vacation.

Pairing Ideas: What to Serve with Virgin Piña Colada

Tropical Food Matches

You can turn your Piña Colada into the star of a Caribbean-themed meal with the right food pairings.

Best matches include:

  • Grilled shrimp skewers

  • Coconut rice with jerk chicken

  • Fish tacos with mango salsa

  • Spicy Caribbean plantains

The creaminess of the Piña Colada balances spice and salt beautifully.

FAQs

1. Can I make Virgin Piña Colada ahead of time?

Yes, you can! Blend all the ingredients, pour the mixture into a jug or mason jar, and store it in the fridge for up to 24 hours. Give it a good stir or quick blend before serving, as it may separate slightly. For the freshest flavor and texture, though, it’s best served immediately.

2. What’s the difference between coconut cream and coconut milk?

Coconut cream is thicker, richer, and has a higher fat content than coconut milk. It’s what gives Piña Colada that signature creamy texture. Coconut milk is thinner and more liquid—great for curries but not ideal as the main base for this drink unless you’re going for a lighter version.

3. Can I use frozen pineapple instead of juice?

Absolutely! Frozen pineapple works great and gives the drink a naturally thick, slushy consistency. It also cuts down on the need for added ice, keeping the flavor from getting watered down. Just make sure your blender can handle frozen fruit.

4. Is Virgin Piña Colada healthy?

It can be! When made with fresh pineapple, unsweetened coconut cream, and no added sugars, it’s a naturally sweet, fruit-forward beverage. You can boost its health factor further by adding Greek yogurt or swapping coconut cream for light coconut milk or coconut water.

Easy & Creamy Strawberry Cheesecake Recipe

0
Strawberry Cheesecake Recipe

Who doesn’t love a good cheesecake? And when it’s topped with fresh, juicy strawberries — it’s downright heavenly. This Strawberry Cheesecake Recipe is the perfect blend of creamy, tangy, and sweet with a buttery graham cracker crust and a crown of vibrant strawberry topping. Whether you’re a baking newbie or a dessert connoisseur, this is a recipe you’ll want to keep in your back pocket forever.

Key Ingredients

Cream Cheese – The Star of the Show

Use full-fat, brick-style cream cheese (not the spreadable kind). It gives the cheesecake that dense, rich texture everyone loves.

Fresh Strawberries – Sweet, Juicy, and Vibrant

You’ll need them for the topping and (optionally) to blend into the filling. Choose ripe, red, fragrant strawberries for best results.

Graham Cracker Crust – A Buttery, Crunchy Base

Crushed graham crackers mixed with melted butter and sugar form the classic cheesecake foundation.

Sugar, Vanilla & Eggs – Binding It All Together

Sugar sweetens, vanilla adds aroma, and eggs hold everything in place while baking.

Optional Toppings and Swirls

Want to get fancy? Add strawberry puree swirls, chocolate drizzle, or even a gelatin glaze for a glossy finish.

Essential Tools You’ll Need

  • 9-inch Springform Pan – Makes removing the cheesecake clean and easy.

  • Electric Mixer – Stand or handheld, both work.

  • Food Processor – For crushing graham crackers (or use a ziplock and rolling pin).

  • Cooling Rack – Essential for proper airflow after baking.

  • Roasting Pan – For the water bath.

Step-by-Step Recipe Instructions

1. Make the Graham Cracker Crust

  • Ingredients:

  • 1½ cups crushed graham crackers, ⅓ cup melted butter, 2 tbsp sugar

  • Mix everything in a bowl until it resembles wet sand.

  • Press into the bottom (and slightly up the sides) of your springform pan.

  • Bake at 175°C (350°F) for 10 minutes. Let cool.

2. Prepare the Cream Cheese Filling

  • Ingredients:

    • 3 packs (8 oz each) cream cheese, softened

    • 1 cup sugar

    • 3 large eggs

    • 1 tsp vanilla extract

    • 1 cup sour cream

  • Beat cream cheese and sugar until smooth.

  • Add eggs one at a time, mixing on low speed.

  • Stir in vanilla and sour cream until well combined.

3. Bake the Cheesecake (Water Bath Method)

  • Wrap the outside of the pan with 2–3 layers of foil to prevent leaks.

  • Pour batter into the crust.

  • Place the pan in a large roasting dish. Add hot water halfway up the sides.

  • Bake at 160°C (325°F) for 60–70 minutes until the center is slightly jiggly.

  • Turn off the oven, crack the door, and let it sit for 1 hour.

4. Chill the Cheesecake

  • Remove from oven and water bath.

  • Cool to room temperature.

  • Refrigerate for at least 6 hours or overnight.

5. Make the Fresh Strawberry Topping

  • Slice 1½ cups fresh strawberries.

  • In a pan, heat with 2 tbsp sugar and 1 tsp lemon juice.

  • Simmer until slightly thickened, about 5–7 minutes.

  • Let cool completely before spooning over the chilled cheesecake.

Strawberry Cheesecake

Tips for a Perfect Cheesecake

  • Use room temperature ingredients to avoid lumps.

  • Don’t overmix — too much air leads to cracks.

  • A water bath helps keep the top smooth and creamy.

  • Allow plenty of chilling time for best texture and flavor.

Variations and Flavor Twists

No-Bake Strawberry Cheesecake

Skip the oven entirely by using a gelatin-set filling and chilling for 8+ hours.

Chocolate Drizzle or Ganache Layer

Add a thin layer of dark chocolate ganache before the strawberry topping.

Strawberry Swirl Cheesecake

Blend strawberries into part of the batter and swirl before baking.

Mini Cheesecake Cups

Make them in muffin tins for adorable individual servings.

Serving Suggestions

  • A dollop of fresh whipped cream takes it over the top.

  • Add a few whole fresh strawberries or a sprig of mint for garnish.

  • Sprinkle some lemon zest for a refreshing citrus kick.

Make Ahead and Storage Tips

  • Make Ahead: You can prepare it 2–3 days in advance.

  • Storage: Keep in the fridge, covered, for up to 5 days.

  • Freezing: Freeze slices (without toppings) for up to 2 months.

  • Slicing Tip: Use a sharp knife dipped in hot water and wiped clean between slices.

Why You’ll Love This Recipe

This isn’t just dessert — it’s celebration on a plate. It’s the kind of dessert that gets people asking for seconds (and the recipe). It’s creamy, tangy, sweet, and topped with strawberries that make it feel like summer all year round.

Common Mistakes to Avoid

  • Overmixing the batter introduces air bubbles that lead to cracks.

  • Skipping the water bath can cause uneven baking.

  • Cutting too soon — always chill the cheesecake completely.

Final Thoughts

This Strawberry Cheesecake recipe is pure bliss. With a rich and creamy filling, buttery crust, and juicy strawberry topping, it’s the ultimate dessert for birthdays, holidays, or lazy weekends. Take it slow, follow the steps, and you’ll bake up a cheesecake worthy of any bakery display — but way more satisfying because you made it.

FAQs

1. Can I use frozen strawberries?
Yes, just thaw and drain them first to avoid excess moisture in the topping.

2. What’s a good substitute for graham crackers?
You can use digestive biscuits, vanilla wafers, or crushed Oreos.

3. How do I fix a cracked cheesecake?
Cover it with strawberry topping or whipped cream — no one will notice!

4. Can I make it without eggs?
Yes, use an egg substitute or try a no-bake cheesecake version.

5. How long should cheesecake cool before serving?
Let it cool to room temperature, then refrigerate for at least 6 hours, preferably overnight.

Authentic Bengali Shorshe Murgi Recipe | Traditional Mustard Chicken Curry

0
Bowl of Bengali Shorshe Murgi

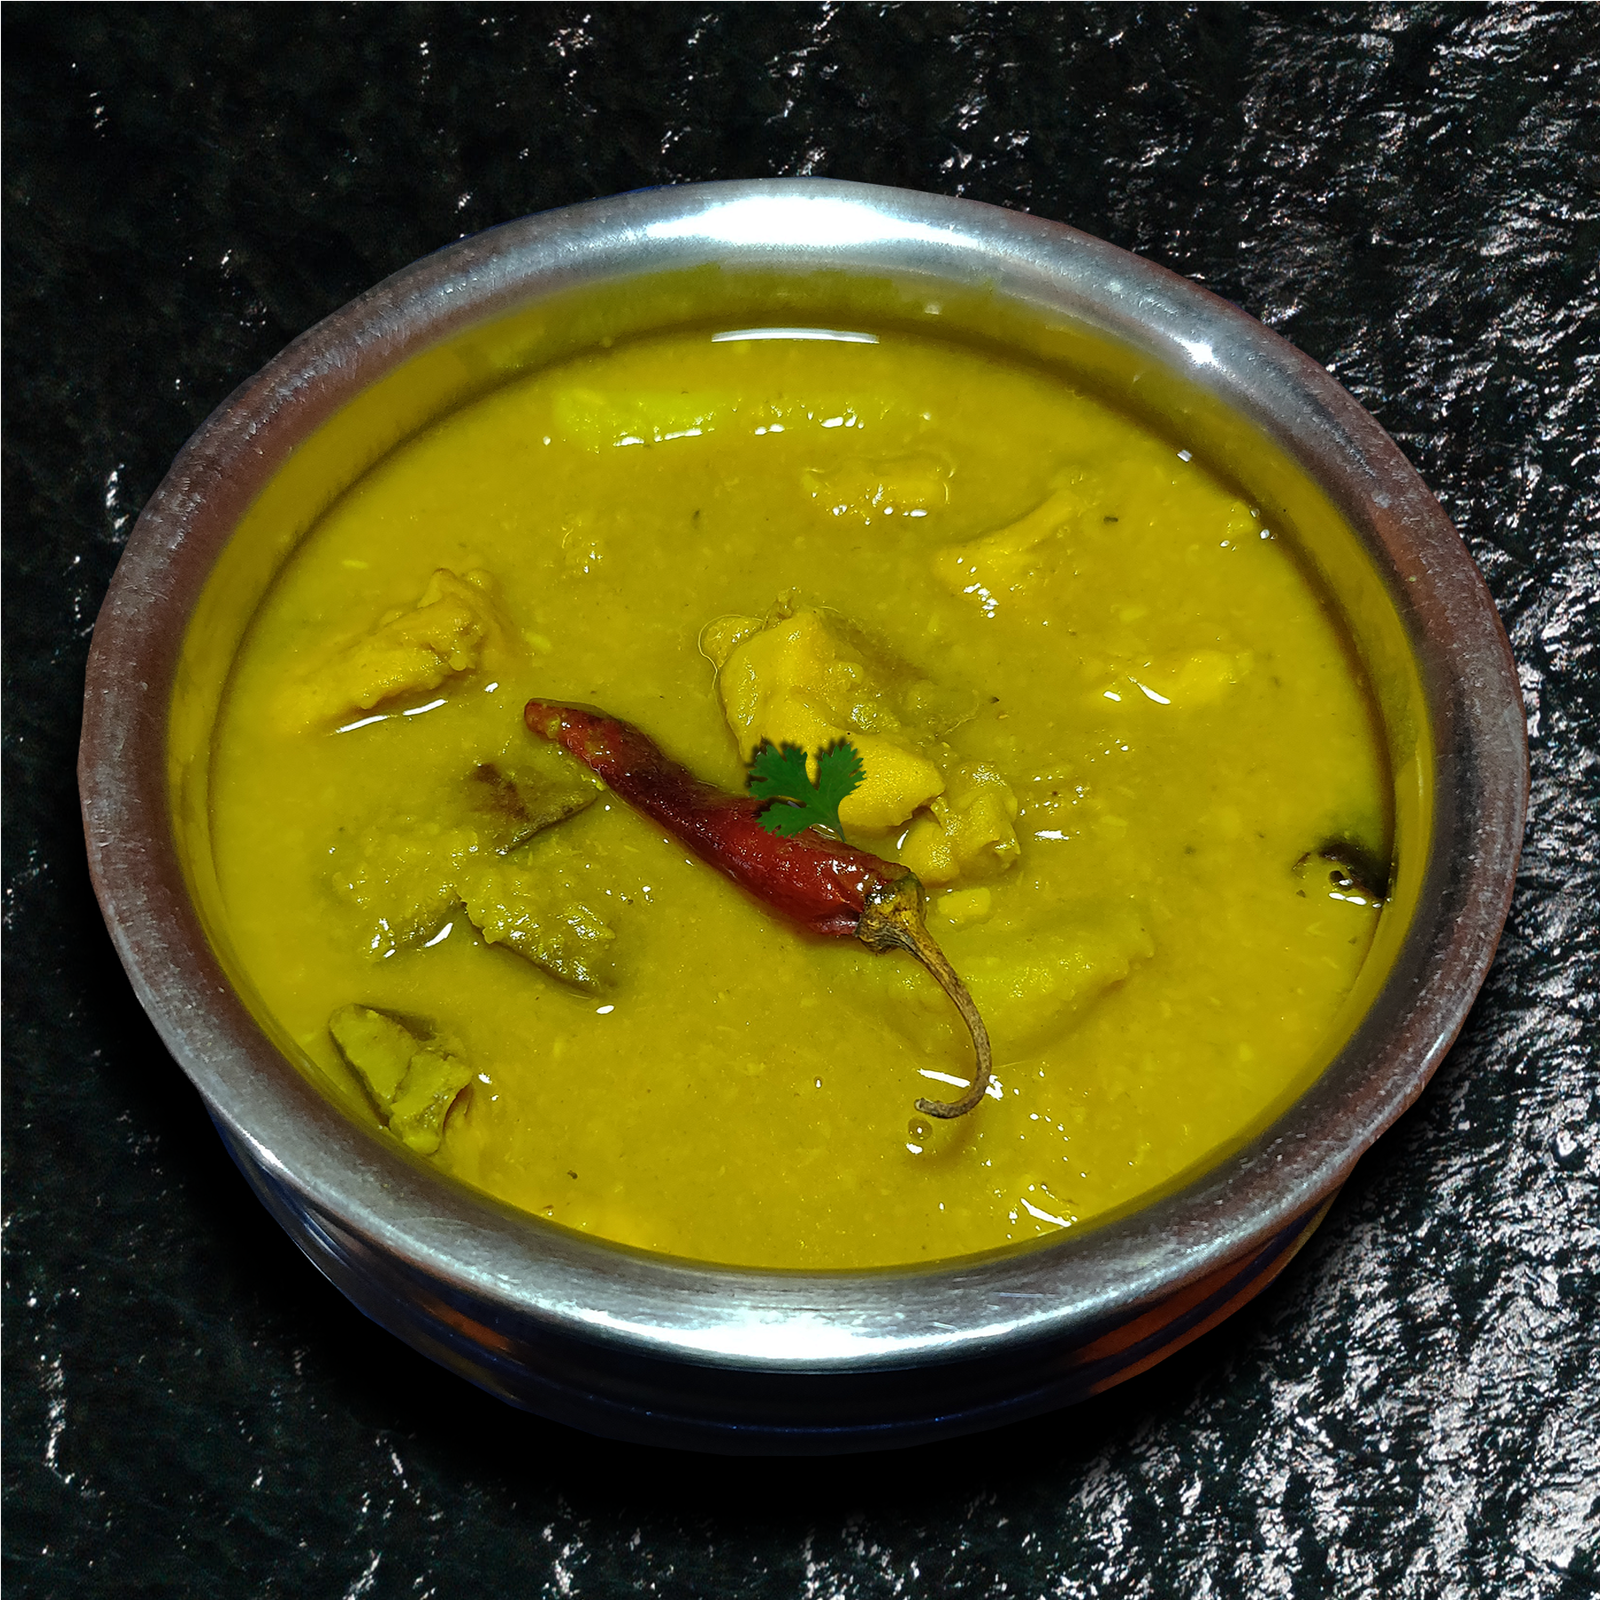
Introduction: What is Shorshe Murgi?

Shorshe Murgi is a bold, flavorful Bengali chicken curry cooked with a pungent mustard seed paste and mustard oil. The term “shorshe” refers to mustard, and “murgi” means chicken in Bengali. This dish brings together sharpness, spice, and simplicity—a true representation of traditional Bengali home cooking.

Unlike North Indian or Mughlai-style chicken curries that are rich with cream or nuts, Shorshe Murgi is rustic, pungent, and deeply aromatic, making it both unique and unforgettable.

The History of Mustard in Bengali Cuisine

A Legacy Rooted in the Land

Mustard has been cultivated in Bengal for centuries. The region’s climate is ideal for growing both yellow and black mustard seeds, which have always been central to Bengali agriculture and cuisine.

In Bengali kitchens:

  • Mustard seeds are used for tempering.

  • Mustard paste is used for making gravies.

  • Mustard oil is the primary cooking medium.

From shorshe ilish (mustard hilsa) to aloo shorshe and shorshe begun, the flavor of mustard defines Bengali cooking. Shorshe Murgi is a more recent addition, marrying mustard with chicken instead of the more traditional fish.

Cultural Significance of Shorshe Murgi

This dish is especially loved during:

  • Family gatherings

  • Monsoon evenings

  • Weekend lunches

  • Festive meals like Noboborsho (Bengali New Year)

Though fish reigns supreme in Bengali households, chicken has become more accepted over the years. With younger generations and urban Bengali homes experimenting more, Shorshe Murgi has become a symbol of modern-traditional fusion.

Flavor Profile: What Makes Shorshe Murgi Unique?

  • Pungency from the mustard seeds

  • Heat from green chilies

  • Earthiness from mustard oil

  • Mild bitterness balanced by turmeric and onions

  • No garam masala – the mustard stands alone

How to Make Shorshe Murgi (Step-by-Step)

Step 1: Soak and Make the Mustard Paste

  • Soak mustard seeds in warm water for 20 minutes.

  • Grind with green chilies, salt, and a bit of water to make a smooth paste.

Step 2: Marinate the Chicken

  • Mix chicken with turmeric, salt, and half of the mustard paste.

  • Let it marinate for at least 30–60 minutes.

Step 3: Heat the Mustard Oil

  • Heat mustard oil in a pan until it smokes.

  • Lower the heat to medium. This removes the oil’s raw pungency.

Step 4: Sauté Onions and Aromatics

  • Add sliced onions and sauté till light golden.

  • Add ginger-garlic paste and fry until the smell disappears.

Step 5: Cook the Chicken

  • Add marinated chicken to the pan.

  • Cook on high heat for 5 minutes, stirring occasionally.

Step 6: Add Mustard Paste and Water

  • Add the remaining mustard paste and slit green chilies.

  • Pour in water to make a gravy (about 1/2 to 3/4 cup).

  • Cover and cook on low flame for 20–25 minutes or until chicken is done.

How to Serve Shorshe Murgi

Best Accompaniments:

  • Steamed basmati rice or Gobindobhog rice

  • Luchi (Bengali-style fried puris)

  • Parboiled rice (bhaat) with a dollop of ghee

Side Suggestions:

  • Begun Bhaja (fried eggplant)

  • Alu Posto (potato in poppy seed paste)

  • Raw onion salad with lemon

Why Mustard Oil is Important in Shorshe Murgi

  • Adds depth and complexity

  • Authentic Bengali aroma

  • Contains omega-3 fatty acids

  • Anti-bacterial and warming in nature

Never skip heating it to the smoking point, or the raw smell will overpower the dish.

Expert Tips for the Best Shorshe Murgi

  1. Always soak mustard seeds before grinding to reduce bitterness.

  2. Avoid overcooking mustard paste—it may turn bitter.

  3. Use fresh green chilies for sharpness instead of red chili powder.

  4. Don’t use garam masala or cream. Keep it rustic.

  5. Let the dish sit covered for 10 minutes before serving to allow flavors to bloom.

Common Mistakes to Avoid

  • Using too many spices – it ruins the mustard flavor.

  • Not soaking mustard – bitterness becomes harsh.

  • Overcooking onions – makes the curry sweet, not savory.

  • Using vegetable oil – mustard oil is non-negotiable for authenticity.

Leftovers & Storage

  • Store in an airtight container.

  • Keeps well in the fridge for up to 2 days.

  • Reheat gently on a stovetop. Avoid microwaving—may turn the mustard bitter.

Frequently Asked Questions (FAQs)

1. Can I use only yellow mustard seeds?

Yes, but the flavor will be milder. A mix of yellow and black seeds is best.

2. Is this dish too spicy?

Not at all. It has sharpness, not burn-your-mouth heat. You can reduce green chilies.

3. Can I add potatoes?

Yes! Fried or boiled potatoes go well in Bengali curries.

4. Can this be made in mustard paste bought from a store?

Yes, but check the ingredients. Many commercial pastes include vinegar or preservatives.

5. Is mustard oil healthy?

Yes, in moderation. It’s rich in omega-3 and has antimicrobial properties.

Paneer Butter Masala recipe: A Creamy Delight of Indian Cuisine

0
paneer butter masala

Paneer butter masala, a dish that beautifully marries the richness of Indian spices with the creamy goodness of paneer (cottage cheese), holds a special place in the heart of Indian cuisine enthusiasts. Whether you’re a connoisseur of Indian flavors or a curious food explorer, this article invites you on a flavorful journey to uncover the secrets behind creating the perfect paneer butter masala. Get ready to tantalize your taste buds and immerse yourself in the vibrant culinary heritage of India.

In the heart of India’s diverse cuisine, Paneer Butter Masala stands out as a culinary masterpiece. This dish encapsulates the essence of Indian comfort food, combining soft paneer cubes with a luscious tomato-based gravy. The blend of aromatic spices, creaminess, and a touch of sweetness makes every bite a celebration of flavors.

The Origins of Paneer Butter Masala

Paneer Butter Masala, also known as Paneer Makhani, finds its origins in the vibrant culinary landscape of North India, particularly the state of Punjab. This rich and hearty dish gained popularity for its exquisite combination of flavors, making it a staple in both local homes and Indian restaurants around the world.

Ingredients

To recreate the magic of Paneer Butter Masala in your own kitchen, gather these essential ingredients:

  1. Paneer: The star of the show, paneer adds a delicate creaminess to the dish. Made from milk, it’s the canvas upon which flavors are painted.
  2. Tomatoes: Ripe and plump, tomatoes bring the necessary tanginess to the gravy. Blanched, pureed, and simmered, they form the essence of the dish.
  3. Aromatic Spices: From earthy cumin to warming cinnamon, the spices create a tapestry of flavors that sing in harmony. Turmeric, red chili powder, and garam masala infuse depth into each bite.
  4. Cream and Butter: The luxurious creaminess owes its existence to dairy. Cream and butter meld with the spices, resulting in a velvety texture that wraps around the paneer cubes.
  5. Cashews: These unassuming nuts contribute to the creamy texture of the gravy. Ground into a paste, they weave an intricate flavor profile that enhances every spoonful.

Instructions: Crafting the Flavors

  1. Blanching the Tomatoes: Boil water and blanch the tomatoes for a few minutes. Remove the skin and blend them into a smooth puree.
  2. Creamy Cashew Paste: Grind cashew nuts into a fine paste using water. This adds a creamy texture to the gravy.
  3. Sautéing the Base: Heat oil in a pan, add cumin seeds, and let them sizzle. Add chopped onions and sauté until golden brown. Introduce ginger-garlic paste and green chilies, cooking until the raw aroma fades.
  4. Tomato Magic: Incorporate the tomato puree into the mixture and cook until the oil separates. Sprinkle turmeric, red chili powder, and salt, sautéing well.
  5. Cashew Creaminess: Stir in the cashew paste, allowing the flavors to meld and create a rich, velvety texture.
  6. Paneer Unveiled: Gently slide in the paneer cubes and let them simmer in the gravy. Add a touch of sugar to balance the acidity.
  7. Aromatic Infusion: Sprinkle garam masala and kasuri methi, infusing the dish with an irresistible aroma.
  8. Creamy Indulgence: Pour in the heavy cream and let the dish simmer on low heat for a few more minutes. This step contributes to the dish’s signature creamy consistency.
  9. Finishing Touch: Finish with a dollop of butter and a sprinkle of fresh cilantro leaves.

Tips for a Perfect Paneer Butter Masala

Crafting the perfect paneer butter masala requires attention to detail and a dash of expertise. Here are some tips to ensure your dish is a resounding success:

  • Paneer Quality: Opt for fresh paneer to achieve a soft and creamy texture that perfectly absorbs the flavors of the gravy.
  • Cream Balance: Adjust the amount of cream according to your preference. More cream results in a richer texture, while less cream yields a lighter dish.
  • Spice Spectrum: Play with the spice levels by adjusting the amount of red chili powder and green chilies. This allows you to tailor the dish to your preferred level of heat.
  • Kasuri Methi Magic: Kasuri methi adds a distinct flavor profile. Crush it between your palms before adding it to enhance its aroma and taste.
  • Butter Bliss: Don’t skimp on butter – it’s an essential ingredient that elevates the dish’s taste and richness.
paneer-butter-masala

How to make Paneer Butter Masala

  • In a kadai heat oil and Add cumin seeds and let them splutter.
  • Add bay leaf, cinnamon stick, green cardamom, cloves, ginger, garlic, green chilli, onion and saute them until translucent.
  • Now add dry kashmiri red chilli and continue cooking for 2-3 minutes or until it’s fragrant.
  • Then add the cashew nuts, tomatoes, salt,red chilli powder, coriander powder, turmeric powder and saute for 2 minutes on medium high heat.
  • Add the water then cover and cook for 10-12 minutes or until the tomatoes are soft.
  • Finish it with kewra water and switch off the flames, let it cool down and then grind it into a fine paste with a hand blender or mixture grinder. Keep aside for further use.
  • In a kadai heat butter and add Kashmiri red chili powder.
  • Now pour the prepared gravy, butter, honey, garam masala powder and mix everything properly then bring it to a boil.
  • Add paneer cubes and boil for 4-5 minutes on medium heat.
  • Switch off the flames. Add fresh cream, kasuri methi leaves and coriander leaves. Mix well.
  • Serve hot and garnish with fresh cream and coriander leaves.

The Cultural Significance

Beyond its culinary excellence, Paneer Butter Masala holds cultural significance. It often graces the tables during festive occasions, symbolizing unity, celebration, and the joy of sharing a meal with loved ones.

Mastering Paneer Butter Masala at Home

With the right blend of passion and technique, mastering Paneer Butter Masala at home is an achievable feat. Experiment with spice levels, creaminess, and garnishes to create a version that suits your taste buds.

The Magic of Creaminess

Creaminess is at the heart of Paneer Butter Masala’s appeal. A velvety texture is achieved by blending cashew nuts into a creamy paste and incorporating it into the gravy, resulting in a dish that is both indulgent and satisfying.

Garnishing for Visual Appeal

A dash of fresh cilantro leaves adds a burst of color and freshness to the dish. The vibrant green hue beautifully complements the rich red tones of the gravy, making it a feast for the eyes as well as the palate.

The Perfect Pairings

To fully appreciate the symphony of flavors that is paneer butter masala, consider these delectable pairings:

  • Naan: Soft and pillowy, naan is the ideal vessel for scooping up every bit of the creamy gravy.
  • Jeera Rice: The subtle aroma of cumin-infused rice provides a balanced backdrop to the rich flavors of the dish.
  • Roti: For a more rustic experience, the hearty roti complements the dish’s robust flavors.

Finally, I request you to check my other detailed Paneer Recipe Collection with this post of Paneer Butter Masala recipe. It mainly includes my other related recipe variants like Chole Paneer Masala Recipe, Paneer gravy with Pumpkin Seeds Recipe. Further to these, I would also like to mention my other related recipe categories like,

FAQs About Paneer Butter Masala

Q: Can I use store-bought paneer for this recipe?

A: Absolutely! While homemade paneer offers a superior texture, store-bought paneer works well too.

Q: Is there a dairy-free version of paneer butter masala?

A: Indeed! You can substitute paneer with tofu and use dairy-free cream to make a vegan-friendly version.

Q: How can I reduce the spice level?

A: To tame the spiciness, reduce the amount of red chili powder and omit or reduce the number of green chilies.

Q: What can I serve with paneer butter masala?

A: It pairs wonderfully with naan, roti, rice, or even pulao for a complete and satisfying meal.

Q: Can I make the dish ahead of time?

A: Of course! Prepare the dish without adding cream, and add cream and butter just before serving to retain the freshness.

Q: What’s the origin of paneer butter masala?

A: Paneer butter masala traces its roots to North Indian cuisine and is a beloved classic in Punjabi cooking.

Mango Burfi Recipe With Khoya | Mango Barfi Recipe

0
mango-burfi-

Mango burfi, a delectable Indian dessert, combines the irresistible flavors of ripe mangoes with the rich sweetness of burfi. This delightful fusion captures the essence of tropical summers and traditional Indian sweets. Mango burfi offers a perfect balance of fruity tanginess, creamy textures, and a hint of cardamom, creating a treat that is both refreshing and indulgent. Whether you are a mango aficionado or a dessert lover seeking new flavors, mango burfi is a mouthwatering delight that is sure to leave you craving for more.

Mangoes hold a special place in Indian cuisine and culture. Known as the “king of fruits,” mangoes are widely revered for their vibrant flavors and aromatic sweetness. In India, mangoes are celebrated during the summer months when they are abundantly available. From desserts to drinks, mangoes find their way into a myriad of culinary creations.

Burfi, on the other hand, is a traditional Indian sweet made from milk solids, sugar, and ghee. It has been enjoyed for centuries and is an integral part of Indian festivals and celebrations.

Ingredients: Gathering the Burstiness of Flavors

The heart of any recipe lies in its ingredients. To create the perfect Mango Burfi with Khoya, you’ll need a blend of essential elements that come together to create a burst of flavor and texture. Here’s what you’ll need:

  • Ripe Mangoes: The star of the show, ripe mangoes infuse the burfi with bursty sweetness and vibrant color.
  • Khoya: Also known as mawa, khoya adds richness and depth to the dessert, enhancing its burstiness.
  • Sugar: To balance the sweetness of the mangoes and khoya.
  • Ghee: Provides a bursty aroma and enhances the overall texture.
  • Cardamom: Adds a burst of aromatic flavor that complements the mangoes.

Step-by-Step Recipe:

1. Preparing the Mango Puree

Start by peeling and chopping the ripe mangoes. Blend them into a bursty puree using a food processor or blender. The burstiness of the mangoes will shine through in this vibrant puree.

2. Cooking the Khoya

In a heavy-bottomed pan, crumble the khoya and cook it on low heat. Stir continuously to prevent it from sticking to the pan. The khoya will transform into a bursty, golden-brown mixture that exudes a burst of aroma.

3. Mixing Mango Puree and Khoya

Add the bursty mango puree to the cooked khoya and mix well. The burstiness of colors and flavors will merge, creating a bursty fusion that’s hard to resist.

4. Adding Sugar and Cardamom

Introduce the sugar and crushed cardamom to the mixture. The burstiness of the cardamom’s fragrance will infuse the dessert, while the sugar balances the flavors.

5. Achieving the Right Consistency

Continue cooking the mixture on low heat, stirring frequently. The mixture will thicken and start leaving the sides of the pan, indicating its bursty readiness.

6. Shaping and Garnishing

Transfer the bursty mixture onto a greased plate or tray. Flatten it with a spatula to create an even layer. Garnish with chopped pistachios and almonds, adding a burst of crunch and visual appeal.

7. Cutting into Pieces

Once the mixture cools down, use a knife to cut it into desired shapes. Each piece will hold the burstiness of mango and khoya, ready to melt in your mouth.

Tips:

  • Use fully ripe mangoes for the burstiest flavor.
  • To enhance the burstiness, add a pinch of saffron soaked in warm milk to the mixture.
  • Stir continuously while cooking the khoya to avoid sticking.
  • Opt for homemade khoya for a bursty and authentic taste.
  • Garnish with edible rose petals for an added burst of elegance.

Frequently Asked Questions:

Can I use canned mango pulp for this recipe?

Yes, you can use canned mango pulp. However, using fresh ripe mangoes adds a burstiness that canned pulp may lack.

What’s the role of khoya in this recipe?

Khoya adds a bursty richness and creaminess to the burfi, making it even more indulgent and flavorful.

Can I make this recipe vegan?

Absolutely! You can use plant-based khoya and substitute ghee with coconut oil for a bursty vegan version.

How long does Mango Burfi with Khoya stay fresh?

Stored in an airtight container, Mango Burfi can stay fresh for up to a week, retaining its bursty flavors.

Can I freeze Mango Burfi for later consumption?

Yes, you can freeze Mango Burfi in an airtight container for bursty enjoyment later. Thaw it in the refrigerator before relishing the burstiness.

Is this recipe suitable for beginners?

Absolutely! This bursty dessert is relatively simple to make, making it a perfect choice for both beginners and experienced cooks.

How to Make Mango Burfi

  • In a large, heavy-bottomed pan, heat the ghee on medium heat.
  • Add the mango pulp to the pan and cook for a few minutes, stirring continuously.
  • Gradually add the sugar while stirring, allowing it to dissolve completely.
  • Add the cooked khoya/mawa to the pan and mix well.
  • Continue cooking the mixture on low heat, stirring continuously, until it thickens and starts to leave the sides of the pan. This may take approximately 15-20 minutes.
  • Add the cardamom powder to the mixture and mix well.
  • Grease a square or rectangular tray or plate with ghee.
  • Pour the thickened mango burfi mixture onto the greased tray and spread it evenly using a spatula.
  • Allow the mixture to cool completely and set for a few hours at room temperature or in the refrigerator.
  • Once the mango burfi has been set, cut it into square or diamond-shaped pieces using a sharp knife.
  • Serve the mango burfi as a delightful dessert.
  • Store any leftovers in an airtight container in the refrigerator for up to 3-4 days.
mango-burfi

The Making of Mango Burfi : To create mango burfi, the process starts with obtaining ripe mango pulp. The pulp is extracted from fully ripened mangoes and blended until smooth. In a separate pan, khoya or mawa, a solidified milk product, is gently cooked until it reaches a thick, fudge-like consistency.

Once the khoya is ready, the mango pulp is added, along with sugar to sweeten the mixture. The amalgamation is cooked over low heat, stirring continuously until the mixture thickens and starts to leave the sides of the pan. Cardamom powder is added to infuse the burfi with its distinctive aroma.
The thickened mixture is then spread evenly on a greased tray or plate and left to cool. As it sets, the mango burfi solidifies and can be cut into square or diamond-shaped pieces. The final result is a tantalizing blend of mango and burfi, with a smooth and creamy texture that melts in the mouth.

The Burst of Flavors and Textures: Mango burfi offers a symphony of flavors and textures. The ripe mango pulp provides a tangy sweetness that harmonizes with the creamy richness of the burfi. Each bite is a burst of tropical flavor, reminiscent of biting into a juicy mango.

The creamy texture of the burfi adds depth to the dessert, creating a satisfying mouthfeel. As the burfi melts on the tongue, it releases its sweetness, perfectly complementing the fruity notes of the mango. The addition of cardamom powder enhances the overall experience, imparting a subtle spiciness and a pleasant aroma that lingers.

Serving and Enjoying Mango Burfi: Mango burfi can be savored as a dessert or enjoyed with a cup of masala chai for a delightful combination. It is often served during festivals like Eid, Diwali, or Holi, where it adds a touch of sweetness to the celebrations.

The vibrant color and enticing aroma of mango burfi make it an attractive addition to any dessert platter. It can be shared with loved ones or gifted to friends and family, spreading joy and sweetness.

Mango burfi is a heavenly dessert that showcases the brilliance of mangoes and the timeless appeal of burfi. With its harmonious blend of fruity tanginess, creamy textures, and delicate cardamom undertones, mango burfi is an irresistible treat that captures the spirit of summer. Indulge in the lusciousness of this fusion dessert and embark on a culinary journey filled with tropical delight. Let the mango burfi transport your taste buds to a realm of sweetness and leave you yearning for the next bite.

Chole Paneer Masala Recipe | Chana Paneer Recipe

0
chana paneer

Chole Paneer is a delectable dish that beautifully combines the rich flavors of chickpeas (chole) and cottage cheese (paneer). This enticing fusion of North Indian and Punjabi cuisines creates a wholesome and satisfying meal that is enjoyed by people around the world. Chole Paneer not only tantalizes the taste buds but also offers a healthy balance of proteins, fibers, and essential nutrients. In this article, we will delve into the origins of Chole Paneer, explore its key ingredients, and discover the secret behind its irresistible taste.

Chole Paneer is believed to have originated in the vibrant state of Punjab, located in the northern part of India. Punjab is renowned for its rich agricultural produce, and this dish reflects the region’s love for robust flavors and hearty meals. Chole, a spicy and tangy chickpea curry, is a popular staple in Punjabi cuisine, often enjoyed with fluffy Bhature (deep-fried bread). Paneer, on the other hand, is a fresh cheese made from curdled milk, commonly used in various Indian dishes.

The combination of chole and paneer creates a unique blend of textures and tastes that have captured the hearts of food enthusiasts worldwide. Chole Paneer’s popularity has transcended regional boundaries and is now a beloved dish in Indian restaurants and households globally.

Chole Paneer primarily consists of two main components: chickpeas (chole) and cottage cheese (paneer). Let’s take a closer look at each ingredient:

Chickpeas (Chole):
Chickpeas, also known as garbanzo beans, are the star of the dish. They are versatile legumes, rich in protein, dietary fiber, and essential minerals. To prepare chole, the chickpeas are soaked overnight and then cooked with a blend of aromatic spices, such as cumin, coriander, turmeric, and garam masala. This creates a robust and flavorful base for the dish.

Cottage Cheese (Paneer):
Paneer, a fresh cheese made by curdling milk, adds a creamy and luscious element to Chole Paneer. It is prepared by heating milk and then adding lemon juice or vinegar to curdle it. The resulting curds are separated, drained, and pressed to form paneer blocks. Paneer has a mild and slightly tangy flavor, making it the perfect complement to the spicy chole.

Aromatic Spices and Flavorings:
Chole Paneer owes its irresistible taste to a combination of aromatic spices and flavorings. These may include cumin seeds, coriander powder, ginger, garlic, green chilies, tomatoes, onions, and lime juice. The spices are skillfully blended to create a harmonious balance of flavors, with the tangy and robust chole beautifully complementing the creamy paneer.

How to make Chole Paneer

  • Heat oil or ghee in a pan or kadai over medium heat. Add cumin seeds and let them splutter.
  • Add the chopped onions and sauté until they turn golden brown.
  • Add the ginger-garlic paste and green chilies. Cook for a minute until the raw smell disappears.
  • Add the tomato puree and cook for a few minutes until the oil separates from the mixture.
  • Add turmeric powder, red chili powder, coriander powder, and salt. Mix well and cook for another 2-3 minutes.
  • Add the cooked chickpeas (chole) and paneer cubes to the pan. Stir gently to coat them with the spice mixture.
  • Add garam masala and crushed kasuri methi (dried fenugreek leaves). Mix well and cook for an additional 2 minutes.
  • Garnish with fresh coriander leaves.
  • Serve hot with naan, roti, or rice.
chole-paneer-curry

Cooking Method and Serving :

To prepare Chole Paneer, the soaked and cooked chickpeas are combined with a flavorful masala (spice mix) and simmered until the flavors meld together. The paneer, cut into cubes or crumbled, is added towards the end of the cooking process to ensure its delicate texture is preserved. Garnished with fresh coriander leaves, Chole Paneer is best served piping hot, alongside naan, roti, or rice.

The dish offers a delightful medley of tastes and textures. The creamy paneer adds a luxurious element, while the chickpeas provide a hearty and satisfying bite. The tangy and spicy flavors of the chole create a beautiful contrast with the mildness of the paneer. Each mouthful is an explosion of flavors that will leave you craving for more.

Chole Paneer is a culinary masterpiece that perfectly combines the best of North Indian and Punjabi cuisines. With its enticing flavors and wholesome ingredients, this dish has won the hearts and palates of people across the globe. Whether you are a vegetarian or simply looking for a scrumptious and satisfying meal, Chole Paneer is a must-try. The rich history and cultural significance of this dish, along with its delectable taste, make it a beloved favorite in Indian households and restaurants worldwide. So, go ahead and savor the fusion of flavors in Chole Paneer – a dish that truly exemplifies the magic of Indian cuisine.

Health Benefits :
Apart from its delectable taste, Chole Paneer also offers several health benefits. Chickpeas are an excellent source of plant-based protein, dietary fiber, and essential minerals such as iron and folate. They contribute to satiety and promote digestive health. Paneer, being a dairy product, provides a good amount of calcium, protein, and healthy fats. The combination of chickpeas and paneer creates a balanced and nutritious meal option, especially for vegetarians and vegans looking to meet their protein requirements.

Mango Lassi

0
mango lassi

Mango Lassi is a popular drink that originates from the Indian subcontinent. It is a refreshing blend of yogurt, mango pulp, sugar, and ice that is often served as a cooling beverage during the hot summer months. Mango lassi is a delicious and nutritious drink that is loved by many people all over the world.

Introduction

When the sun casts its warm glow and the air is thick with the promise of summer, there’s no better way to quench your thirst and treat your taste buds than with a tall, frosty glass of mango lassi. This iconic Indian beverage is more than just a drink; it’s a celebration of the luscious mango season, a harmonious blend of flavors, and a journey into the heart of Indian culinary culture.

Mango lassi is more than a drink; it’s an experience that captures the essence of summer, the joy of tradition, and the artistry of flavors. As you sip this golden elixir, you’re savoring a piece of India’s rich culinary heritage.

The Origins of Mango Lassi

The origins of mango lassi are unclear, but it is believed to have originated in the Punjab region of India. Lassi, a traditional yogurt-based drink, has been consumed in India for centuries. Mangoes were introduced to India in the 16th century by the Mughal emperors, and since then, mango lassi has become a popular variation of the traditional lassi.

The roots of mango lassi can be traced back to the vibrant streets of India, where mango reigns as the king of fruits. As the mango season arrives, households across the country embrace the art of crafting this velvety delight. From bustling markets to quaint roadside stalls, the aroma of mango lassi fills the air, beckoning all to savor its heavenly taste.

The Essence of Mango Lassi

Bold, vibrant, and irresistibly sweet, the mango takes center stage in the creation of mango lassi. This tropical fruit, renowned for its succulent flesh and distinctive aroma, is the soul of this delightful beverage. But what sets mango lassi apart is the marriage of mango with another culinary superstar: yogurt.

The Making of Mango Lassi

Creating the perfect mango lassi is an art that requires the right ingredients and a touch of finesse. Here’s a simple recipe to guide you:

Ingredients:

  • Ripe mangoes, peeled and diced
  • Fresh yogurt
  • Sugar or honey (optional, depending on mango sweetness)
  • Ice cubes
  • A pinch of cardamom powder (optional, for extra flavor)

Instructions:

  1. Blend the Mangoes: In a blender, combine the diced mangoes, yogurt, and ice cubes. If using, add a pinch of cardamom powder for an aromatic twist.
  2. Sweeten to Taste: Depending on the sweetness of the mangoes, you can add a touch of sugar or honey. Blend until the mixture is smooth and creamy.
  3. Chill and Serve: Pour the mango lassi into glasses, garnish with a mango slice or mint leaves, and serve chilled.

How to make Mango Lassi

  • In a blender, combine the yogurt, mango pulp, sugar, and ice.
  • Blend until smooth and frothy.
  • Add a pinch of ground cardamom for an extra flavor boost (optional).
  • Pour the mango lassi into glasses and serve immediately.
mango lassi

Cultural Significance

Mango lassi isn’t just a drink; it’s a cultural emblem that’s deeply ingrained in Indian cuisine. It’s a beloved companion to spicy meals, offering a cooling contrast to the heat of Indian spices. During mango season, mango lassi becomes a symbol of joy and festivity, bringing people together to celebrate the bountiful harvest.

Nutritional Benefits of Mango Lassi

Mango Lassi is not only delicious but also packed with nutrition. Here are some nutritional benefits of mango lassi:

  1. High in Fiber: Mangoes are a good source of dietary fiber, which helps to keep the digestive system healthy.
  2. Rich in Vitamins: Mangoes are a rich source of vitamins A and C, which are important for maintaining healthy skin, eyes, and immune systems.
  3. Good for Bone Health: Mangoes are a good source of calcium and vitamin K, which are important for maintaining strong and healthy bones.
  4. Probiotic Benefits: Yogurt is a good source of probiotics, which help to improve gut health and boost the immune system.

FAQs about Mango Lassi

Q: Is mango lassi only popular in India?

A: While mango lassi originates from India, its popularity has spread worldwide due to its irresistible taste and versatility.

Q: Can I use frozen mangoes for making mango lassi?

A: Absolutely! Frozen mangoes work well and can actually make your lassi even more refreshing.

Q: What’s the best type of mango to use?

A: Alphonso mangoes are widely considered the best for mango lassi due to their natural sweetness and flavor.

Q: Can I make a vegan version of mango lassi?

A: Yes, you can substitute dairy yogurt with plant-based yogurt for a vegan-friendly mango lassi.

Q: Are there any variations of mango lassi?

A: Indeed! You can experiment with adding ingredients like saffron, rose water, or even a hint of mint for unique flavors.

Q: Can children enjoy mango lassi?

A: Absolutely! Mango lassi’s delightful taste and natural sweetness make it a hit among kids.

Q: What is Mango Lassi?

A: Mango Lassi is a traditional Indian beverage made by blending ripe mangoes with yogurt, sugar, and sometimes a touch of cardamom. It results in a creamy and refreshing drink.

Q: Can I make Mango Lassi at home?

A: Absolutely! Making Mango Lassi at home is easy. Just blend ripe mangoes, yogurt, sugar, and a bit of cardamom until smooth. You can adjust the ingredients to suit your taste.

Q: What type of mango is best for Mango Lassi?

A: The best mango for Mango Lassi is one that is sweet and flavorful. Varieties like Alphonso, Ataulfo, or Kent are commonly used due to their rich taste and smooth texture.

Q: Is Mango Lassi served chilled?

A: Yes, Mango Lassi is typically served chilled. You can refrigerate it for a while before serving or even add ice cubes to make it extra refreshing.

Q: Can I customize Mango Lassi with additional ingredients?

A: Certainly! While the classic recipe is delicious on its own, you can get creative by adding a dash of saffron, a sprinkle of chopped nuts, or even a drizzle of honey for extra flavor and texture.

Mango Lassi is a delicious and nutritious drink that is loved by many people around the world. It is easy to make and can be customized to suit individual tastes. Mango lassi is packed with nutrition and is a great way to stay cool and hydrated during the hot summer months. Whether you enjoy it plain or with a twist, mango lassi is a refreshing drink that is sure to satisfy your taste buds.

0
    0
    Your Cart
    Your cart is emptyReturn to Shop