Home Blog Page 5

Peanut Butter Recipe

0
smooth peanut butter

Peanut butter is made from roasted peanuts and it is very healthy. Anyone can make peanut butter easily at home in the food processor and can adjust sweetness and saltiness according to taste. I personally love peanut butter and can eat it at any time.

Peanut butter is a staple in many households worldwide, and for good reason. Not only is it delicious, but it also offers a variety of health benefits.

Peanut butter is made by grinding roasted peanuts into a paste. It can be smooth or chunky, and can be found in most grocery stores and supermarkets. Some brands also offer organic and natural options, which are made with minimal processing and without added sugars or preservatives.

One of the key benefits of peanut butter is that it is a great source of protein. Protein is essential for building and repairing muscle tissue, and for maintaining a healthy immune system. Two tablespoons of peanut butter contain around 8 grams of protein, making it a great option for vegetarians and vegans who may have difficulty getting enough protein from other sources.

Peanut butter is also a good source of healthy fats. The majority of the fats found in peanut butter are monounsaturated and polyunsaturated fats, which have been shown to reduce the risk of heart disease. In addition, peanuts contain antioxidants, which help to protect the body against damage from harmful molecules known as free radicals.

Another benefit of peanut butter is that it is relatively low in carbohydrates. This makes it a great option for people following a low-carb diet, or for those trying to control their blood sugar levels.

Peanut butter can be enjoyed in a variety of ways. It can be spread on bread or crackers, added to smoothies, or used as a topping for oatmeal or yogurt. It can also be used as a base for sauces and marinades and can be added to baking recipes for a touch of flavor and a boost of protein.

How to make Peanut Butter at home

  • Dry roast the Peanuts.
  • In a food processor, add the roasted Peanuts and grind it well.
  • Now, add salt, honey, powdered sugar and refined oil and grind it again to desired consistency.
  • Remove and store in an airtight container in the fridge.

Peanut butter is a delicious and versatile food that offers a variety of health benefits. Its high protein content, healthy fats, and antioxidants make it a great addition to any diet. So next time you are looking for a healthy and tasty snack, reach for a jar of peanut butter.

Print
smooth peanut butter

Peanut Butter

  • Author: admin
  • Prep Time: 10 minutes
  • Cook Time: 10 minutes
  • Total Time: 20 minutes

Scale

Ingredients

  • 2 cups Peanuts
  • a pinch of salt
  • 2 teaspoons refined oil
  • 1 teaspoon honey
  • 2 teaspoons powdered sugar

Instructions

  1. Dry roast the Peanuts.
  2. In a food processor, add the roasted Peanuts and grind it well.
  3. Now, add salt, honey, powdered sugar and refined oil and grind it again to desired consistency.
  4. Remove and store in an airtight container in the fridge.


Nutrition

  • Serving Size: 8
  • Calories: 222
  • Sugar: 2.8g
  • Sodium: 26mg
  • Fat: 19.1g
  • Saturated Fat: 2.7g
  • Carbohydrates: 7.3g
  • Fiber: 3.1g
  • Protein: 9.4g
  • Cholesterol: 0mg

Keywords: Peanut Butter

Chicken Momos Recipe

0
Steam chicken momos

Chicken Momos originated in Tibet but have become very popular all over India within a few times. This chicken momo recipe is perfect for any occasion! Whether you’re looking for a quick snack or a hearty meal, these momos will hit the spot. Made with ground chicken, they’re packed with flavor and sure to please everyone at the table. So what are you waiting for? Give them a try today! Momo, a type of dumpling, is a popular Tibetan dish. This chicken momo recipe is easy to make and can be served as an appetizer or main course.

Chicken momos are a popular delicacy originating from the Himalayan region of Nepal, Bhutan, and Tibet. They are similar to Chinese dumplings and consist of a ground chicken filling wrapped in a thin dough. Momos can be steamed or fried and are often served with a spicy dipping sauce.

The history of momos can be traced back to the 7th century in Tibet, where they were originally made with yak meat. However, as the dish spread to other parts of the Himalayan region, the ingredients were adapted to include more readily available meats such as chicken, mutton, and pork. Today, chicken momos are one of the most popular varieties of the dish.

To make chicken momos, ground chicken is mixed with spices such as ginger, garlic, and cumin. The filling is then wrapped in a dough made from flour and water. The momos can be steamed or fried until the dough is cooked through and the filling is hot. They are often served with a spicy dipping sauce made from chili peppers, vinegar, and soy sauce.

Chicken momos are a staple of Nepalese, Bhutanese, and Tibetan cuisine and can be found at street vendors and restaurants throughout the Himalayan region. They have also gained popularity in other parts of the world, particularly in Indian cities with a significant Tibetan population such as Dharamshala and Mcleodganj.

In addition to being a delicious snack, chicken momos are also a convenient and affordable food option. They are easy to make in large batches and can be frozen for later consumption. This makes them a popular choice for families and individuals on a budget.

Overall, chicken momos are a delicious and versatile dish that has stood the test of time. With its rich history and adaptability to different cultures, it’s no wonder that it has become a beloved food across the globe.

How to make Chicken Momos

  1. Knead the dough using refined flour, salt, water, oil and keep aside to rest for 10 minutes.
  2. For fillings, in a mixing bowl add chicken minced, chopped ginger, garlic paste, green onion, black pepper powder, salt, soy sauce, vinegar, oil, coriander leaves and mix well together.
  3. Cut the dough into small portions and make round balls.
  4. Roll out the balls into medium size thin circles and stuff the filling into them.
  5. Give the desired shape to momo.
  6. Steam the momos for 15 minutes in the steamer.
  7. Remove and serve hot with momo chutney.
Print
Steam chicken momos

Chicken Momos

  • Author: admin
  • Prep Time: 20 minutes
  • Cook Time: 15 minutes
  • Total Time: 35 minutes
  • Cuisine: Tibetian

Scale

Ingredients

For Momos Dough

  • 2 cups refined flour/all-purpose flour
  • salt to taste
  • water as required
  • oil

For Momos Filling

  • ½ cup green onion, chopped
  • 1 teaspoon ginger, chopped
  • 2 teaspoons garlic paste
  • 300 gms chicken minced
  • 1 teaspoon soy sauce
  • 1 teaspoon black pepper powder
  • ½ cup coriander leaves
  • 1 teaspoon vinegar
  • salt to taste
  • 1 teaspoon oil

Instructions

  1. Knead the dough using refined flour, salt, water, oil and keep aside to rest for 10 minutes.
  2. For fillings, in a mixing bowl add chicken minced, chopped ginger, garlic paste, green onion, black pepper powder, salt, soy sauce, vinegar, oil, coriander leaves and mix well together.
  3. Cut the dough into small portions and make round balls.
  4. Roll out the balls into medium size thin circle and stuff the filling into it.
  5. Give the desired shape to momo.
  6. Steam the momos for 15 minutes in the steamer.
  7. Remove and serve hot with momo chutney.


Nutrition

  • Serving Size: 5
  • Calories: 268.1
  • Sugar: 0.5 g
  • Sodium: 513.1 mg
  • Fat: 6.4 g
  • Saturated Fat: 1.5 g
  • Carbohydrates: 36.8 g
  • Fiber: 1.8 g
  • Protein: 17.0 g
  • Cholesterol: 36.8 g

Onion Kachori Recipe

0
Onion Kachori

Onion Kachori is a stuffed deep fried spicy snack that is very popular in India. You can find different varieties of Kachoris all over India. Basically, the outer layer of all Kachori is made by using the same kind of dough but the stuffing is varied.

Onion Kachori is a popular Indian snack that is made from a deep-fried pastry filled with a spiced onion filling. It is a popular street food in India and can be found in most street-side food stalls. It is a popular breakfast dish in many parts of India, and is also enjoyed as a snack or a light meal.

The pastry for the kachori is made from a mixture of flour, water, and oil. The filling is made from a mixture of chopped onions, spices, and sometimes, lentils. The kachori is then deep-fried until it becomes golden brown and crispy.

The key ingredients in Onion Kachori include flour, water, oil, onions, and spices such as cumin seeds, ginger, garlic, coriander powder, and red chili powder. The filling can also include lentils, adding a nice texture and protein to the kachori.

Onion Kachori is best served hot, with tamarind chutney, mint chutney or yogurt. It can also be enjoyed with a cup of tea or coffee, making it perfect for a snack or a light meal.

Onion kachori is a popular street food in India and a staple breakfast dish in many parts of India. The dish is a perfect balance of savory and spicy and its crispy exterior and soft interior make it a perfect snack. The filling can be made in advance and stored in the refrigerator, making it easy to make a batch of kachoris quickly.

How to make Onion Kachori at home

  1. In a bowl or a plate take 2 cups of maida or all-purpose flour, ½ tsp black cumin seeds, ½ tsp carom seeds, ¼ tsp baking soda, salt and ghee.
  2. With your fingertips mix 2 tsp ghee with the flour for a few minutes. You have to mix well, till you get a bread crumb like texture in the flour.
  3. Then add water and knead to a smooth dough.
  4. Cover the dough and let rest for 15 minutes.
  5. Heat a pan and add oil.
  6. Add ½ tsp carom seeds, 2 large sliced onions, 1 tsp crushed coriander seeds, ½ tsp cumin powder, 1 tsp red chilli powder, ½ tsp turmeric, salt, saute and stir for 3 minutes on low flame.
  7. Add 3 tsps roasted gram flour and mix well.
  8. Let the mixture cool down.
  9. Now make small balls from this mixture.
  10. After 15 minutes, lightly kneed the dough and divide the dough in equal portions.
  11. Take a portion of the dough and flatten it with the help of your fingers.
  12. Now place the mixture stuffing ball on the dough and bring the edges of the dough together and join them at the center. Excess dough can be pinched off and removed.
  13. Press and then flatten the kachori.
  14. Stuff and prepare all the Kachoris this way.
  15. Heat oil for frying and keep the flame to a low. when the oil is hot enough, you can add the kachoris.
  16. Fry on a low to low to medium flame till the kachoris become golden brown.

In conclusion, Onion Kachori is a popular Indian snack that is made from a deep-fried pastry filled with a spiced onion filling. It is a popular street food in India and can be found in most street-side food stalls. It is a popular breakfast dish in many parts of India, and is also enjoyed as a snack or a light meal. The dish is a perfect balance of savory and spicy and its crispy exterior and soft interior make it a perfect snack. The filling can be made in advance and stored in the refrigerator, making it easy to make a batch of kachoris quickly.

Print
Onion Kachori

Onion Kachori

  • Author: admin

Scale

Ingredients

For Dough

  • 3 cups maida/all-purpose flour
  • ½/ tsp black cumin seeds
  • ½ tsp Carom seeds/Ajwain
  • 2 tsp Ghee
  • ¼ tsp baking soda
  • salt
  • water


For Stuffing

  • 2 tsp oil
  • ½ tsp carom seeds/Ajwain
  • 2 big onion, sliced
  • ½ tsp crushed coriander seeds
  • ½ tsp cumin powder
  • 1 tsp red chilli powder
  • ½ tsp turmeric powder
  • salt
  • 3 tsp roasted gram flour

Instructions

  1. In a bowl or a plat take maida or all-purpose flour, black cumin seeds, carom seeds, baking soda, salt and ghee.
  2. With your fingertips mix the ghee with the flour for a few minutes. You have to mix well, till you get a bread crumb like texture in the flour.
  3. Then add water and knead to a smooth dough.
  4. Cover the dough and let rest for 15 minutes.
  5. Heat a pan and add oil.
  6. Add carom seeds, sliced onion, crushed coriander seeds, cumin powder, red chilli powder, turmeric, salt, saute and stir for 3 minutes on low flame.
  7. Add roasted gram flour and mix well.
  8. Let the mixture cool down.
  9. Now make small balls from this mixture.
  10. After 15 minutes, lightly kneed the dough and divide the dough in equal portions.
  11. Take a portion of the dough and flatten it with the help of your fingers.
  12. Now place the mixture stuffing ball on the dough and bring the edges of the dough together and join them at the center. Excess dough can be pinched off and removed.
  13. Press and then flatten the kachori.
  14. Stuff and prepare all the Kachoris this way.
  15. Heat oil for frying and keep the flame to a low. when the oil is hot enough, you can add the kachoris.
  16. Fry on a low to low to medium flame till the kachoris become golden brown.
  17. Serve kachoris warm with chutney.

Guava Jelly | Guava Jam Recipe

0
Guava jelly|Guava Jam

Guava jelly is a popular spread made from the pink or yellow fruit of the guava tree. This tropical fruit is native to Mexico, Central America, and parts of South America, but can also be found in other warm regions around the world. Guava jelly is known for its sweet, fruity taste and is often used as a spread on toast, crackers, and biscuits. To make this delicious guava jam recipe, all you need is 4 simple ingredients. The perfect fruit spreads with a tropical flavor and guava is the best.

The process of making guava jelly is similar to that of other fruit jellies. The fruit is first washed and then the flesh is removed from the skin and seeds. The flesh is then mashed or pureed to make juice. The juice is then combined with sugar and pectin, which is a natural thickening agent found in many fruits. The mixture is then boiled until it reaches the desired consistency.

One of the benefits of guava jelly is that it is high in vitamin C, which is important for maintaining a healthy immune system. Guava jelly is also a good source of antioxidants, which can help to protect the body against damage from free radicals.

Guava jelly can be found in many grocery stores, specialty food stores, and online. It can also be made at home with fresh guavas, sugar, and pectin. To make guava jelly at home, you will need a large pot, a thermometer, and a jelly bag or cheesecloth to strain the juice.

Guava jelly is a delicious and versatile spread that can be enjoyed in many ways. It can be used as a topping for pancakes or waffles, as a filling for pastries, or as a glaze for meats and poultry. Guava jelly is also a popular ingredient in marinades and sauces for meat and seafood.

How to make Guava Jelly

  • Clean the Guavas and chopped them.
  • Add Guavas to a deep pan.
  • Add 2 glasses of water and boil them until they become soft.
  • Remove and mash them with the help of a masher.
  • Strain the boiled guava juice with a muslin cloth and tie it up.
  • Let the juice pour down in a container.
  • After collecting the guava juice, take a pan and pour the juice into it on high flame.
  • keep stirring and add a pinch of pink food colour.
  • When the juice reduces to half, add sugar and stir constantly.
  • When the juice turns thick, it is time to turn off the flame. 
  • Pour the jelly into a clean glass container after cooling down.

In conclusion, guava jelly is a tasty and nutritious spread that is enjoyed by many people around the world. Whether you purchase it at a store or make it at home, guava jelly is a great way to add a tropical twist to your meals and snacks.

Print
Guava jelly|Guava Jam

Guava Jelly|Guava Jam

  • Author: admin
  • Prep Time: 20 minutes
  • Cook Time: 45 minutes
  • Total Time: 1 hour 5 minutes
  • Category: Jelly

Scale

Ingredients

  • kg fresh ripe Guavas
  • 2 glass water
  • a pinch pink food colour
  • 1 cup of sugar

Instructions

  1. Clean the Guavas and chopped them.
  2. Add Guavas to a deep pan.
  3. Add 2 glasses of water and boil them until they become soft.
  4. Remove and mash them with the help of a masher.
  5. Strain the boiled Guavas juice with a muslin cloth and tie it up.
  6. Let the juice pour down in a container.
  7. After collecting the Guavas juice, take a pan and pour the juice into it on high flame.
  8. keep stirring and add a pinch of pink food colour.
  9. When the juice reduces to half, add sugar and stir constantly.
  10. When juice turns thick, it time to turn of the flame. 
  11. Pour the jelly into a clean glass container after cool down.

Notes

  • You can add 1 tsp lemon juice into the jelly at the time of cooking as a preservative. 

Nutrition

  • Serving Size: 1 tsp
  • Calories: 39.6
  • Sugar: 7.4 g
  • Sodium: 0.7 mg
  • Fat: 0.3 g
  • Saturated Fat: 0.1 g
  • Carbohydrates: 9.2 g
  • Fiber: 1.8 g
  • Protein: 0.9 g

Keywords: Guava ,Jelly, jam

Chicken Curry with Curry Leaves Recipe

1
CHICKEN CURRY WITH CURRY LEAVES IN ASSAMESE STYLE

Chicken curry with curry leaves is an Assamese very simple but tasty dish, which is made using spices in small quantities as it retains the aroma and taste of curry leaves.

Assamese style chicken curry with curry leaves is a traditional dish from the Indian state of Assam. It is a hearty and flavorful curry that is made with tender chicken, aromatic spices, and fresh curry leaves. The dish is known for its unique blend of flavors and is a popular choice among locals and visitors alike.

To make Assamese style chicken curry with curry leaves, you will need the following ingredients: chicken, oil, ginger, garlic, onion, turmeric powder, cumin powder, green chilli, fresh curry leaves, and salt to taste.

The first step in making the curry is to marinate the chicken in a mixture of turmeric powder, cumin powder and salt. Leave the chicken to marinate for at least 30 minutes.

Next, heat oil in a pan and add ginger and garlic. Cook until fragrant, then add the onions and tomatoes. Cook until the onions are translucent and the tomatoes are mushy.

Add the marinated chicken to the pan and cook until the chicken is browned. Then, add the curry leaves and stir everything together. Add water to the pan and bring the mixture to a boil. Reduce the heat to low and let the curry simmer for 20-25 minutes, or until the chicken is cooked through.

The curry should be thick and the chicken should be tender. The curry leaves add a unique aroma and flavor to the dish, making it different from other chicken curry. The curry is usually served with steamed rice but it can also be enjoyed with roti or naan.

Assamese style chicken curry with curry leaves is a delicious and hearty dish that is perfect for a comforting meal. It is a perfect balance of flavors, with the tender chicken, aromatic spices, and fresh curry leaves all working together to create a truly delicious and satisfying dish. Whether you’re a local or a visitor, this curry is sure to become one of your favorite Indian dishes.

In conclusion, Assamese style chicken curry with curry leaves is a traditional and delicious dish from the Indian state of Assam. It is a hearty and flavorful curry that is made with tender chicken, aromatic spices, and fresh curry leaves. This dish is perfect for any occasion and is a must-try for anyone who loves Indian food. So, gather the ingredients and give it a try, you will not regret it!

How to make Chicken Curry with Curry Leaves at home 

  • Heat 3 tsp oil in a pan, add a pinch of sugar, 2 chopped onions and saute till they turn golden brown.
  • Add 1 tsp ginger-garlic paste and saute for 5 minutes.
  • Add ½ tsp cumin powder, ½ tsp turmeric powder and saute till the oil separates from the masala.
  •  Add 300g chicken, green chillies and saute on high heat.
  •  Add potato pieces and salt. Saute for six to ten minutes.
  •  Add 1 cup curry leaves puree and stir it well for another 8 minutes.
  •  Add sufficient water and cook till the chicken and potato pieces are completely cooked.
  • Transfer into a serving bowl and serve hot with rice.

Finally, I request you to check my other detailed Chicken Recipe Collection with this post of Chicken Curry with Curry Leaves recipe. It mainly includes my other related recipe variants like Simple Dal Chicken Recipe, Chicken Curry with Bottle Gourd Recipe, Chicken Curry with Potatoes Recipe. Further to these, I would also like to mention my other related recipe categories like,

Print
CHICKEN CURRY WITH CURRY LEAVES IN ASSAMESE STYLE

Chicken Curry with Curry Leaves in Assamese style

  • Author: admin
  • Prep Time: 15 MINUTES
  • Cook Time: 25 MINUTES
  • Total Time: 40 minutes
  • Cuisine: ASSAMESE

Scale

Ingredients

  • 300g chicken
  • 1 large potato, diced
  • 1 cup curry leaves puree
  • 3 teaspoons mustard oil
  • 2 onion, chopped
  • 1 teaspoon ginger-garlic paste
  • salt to taste
  • ½ teaspoon turmeric powder
  • 3 green chillies
  • ½ teaspoon cumin powder
  • a pinch of sugar

Instructions

  1.   Heat oil in a pan, add a pinch of sugar, chopped onions and saute till they turn golden brown.
  2. Add ginger-garlic paste and saute for 5 minutes.
  3.  Add cumin powder, turmeric powder and saute till the oil separates from the masala.
  4.  Add chicken, green chillies and saute on high heat.
  5.   Add potato pieces and salt. Saute for six to ten minutes.
  6.  Add curry leaves puree and stir it well for another 8 minutes.
  7.  Add sufficient water and cook till chicken and potato pieces are completely cooked.
  8. Transfer into a serving bowl and serve hot with rice.


Nutrition

  • Calories: 180.7
  • Sugar: 2.7 g
  • Sodium: 586.8 mg
  • Fat: 8.6 g
  • Saturated Fat: 1.5 g
  • Carbohydrates: 16.1 g
  • Fiber: 2.6 g
  • Protein: 11.4 g
  • Cholesterol: 26.5 mg

Khaja Recipe

0
Khaja

Khaja is a very popular Indian sweet made by thin rotis. Very few ingredients are used to make Khaja. Khaja is a traditional sweet recipe of Orissa but people of all states in India like to eat it.

How to make Khaja

  • Firstly, prepare sugar syrup adding 2 cups sugar and 1 cup water in a Kadai or saucepan. Bring to a boil and cook till it becomes sticky.
  • In a large bowl take 2 cups maida, ¼ salt and add 4 tsp oil.
  • Crumble and mix well.
  • Add water and knead the smooth dough. cover and rest for 10 minutes.
  • Divide the dough into six equal parts. Take a ball and roll into round shaped roti.
  • Roll as thin as possible. Roll the other balls similarly and keep it aside.
  • Place one roti first and spread oil and flour on top. Now place one more roti on top again spread oil and maida on top. This way place all the 6 rotis one after the other and now fold them together from one corner.
  • Cut into equal-sized pieces and roll each vertically.
  • Heat enough oil in a deep fry pan, fry them in batches, on a medium flame until they turn golden brown on both sides.
  • Dip the fried khaja into the sugar syrup hence prepared. Immediately take the well-coated khaja onto a plate.
Print
Khaja

Khaja

  • Author: admin
  • Prep Time: 10 MINUTES
  • Cook Time: 20 MINUTES
  • Total Time: 30 minutes
  • Cuisine: INDIAN

Scale

Ingredients

For Dough

  • 2 cups maida/all purpose flour
  • ¼ tsp salt
  • 4 tsps oil
  • water

 For Sugar Syrup

  • 2 cups of sugar
  • 1 cup of water
  • Oil for deep frying

Instructions

  1. Firstly, prepare sugar syrup adding 2 cups sugar and 1 cup water in a Kadai or saucepan. Bring to a boil and cook till it becomes sticky.
  2. In a large bowl take 2 cups maida and add 4 tsp oil.
  3. Crumble and mix well.
  4. Add water and knead the smooth dough. cover and rest for 10 minutes.
  5. Divide the dough into six equal parts. Take a ball and roll into round shaped roti.
  6. Roll as thin as possible. Roll the other balls similarly and keep it aside.
  7. Place one roti first and spread oil and flour on top. Now place one more roti on top again spread oil and maida on top. This way place all the 6 rotis one after the other and now fold them together from one corner.
  8. Cut into equal-sized pieces and roll each vertically.
  9. Heat enough oil in a deep fry pan, fry them in batches, on a medium flame until they turn golden brown on both sides.
  10. Dip the fried khaja into the sugar syrup hence prepared. Immediately take the well-coated khaja onto a plate.

Notes

  • Serve Khaja at room temperature.

Nutrition

  • Serving Size: 1 Piece
  • Calories: 316.4
  • Sugar: 49.9 g
  • Sodium: 70.6 mg
  • Fat: 3.4 g
  • Saturated Fat: 0.5 g
  • Carbohydrates: 72.0 g
  • Fiber: 1.0 g
  • Protein: 3.0 g
  • Cholesterol: 0.0 mg

Keywords: Khaja

Tel Pitha Recipe

0
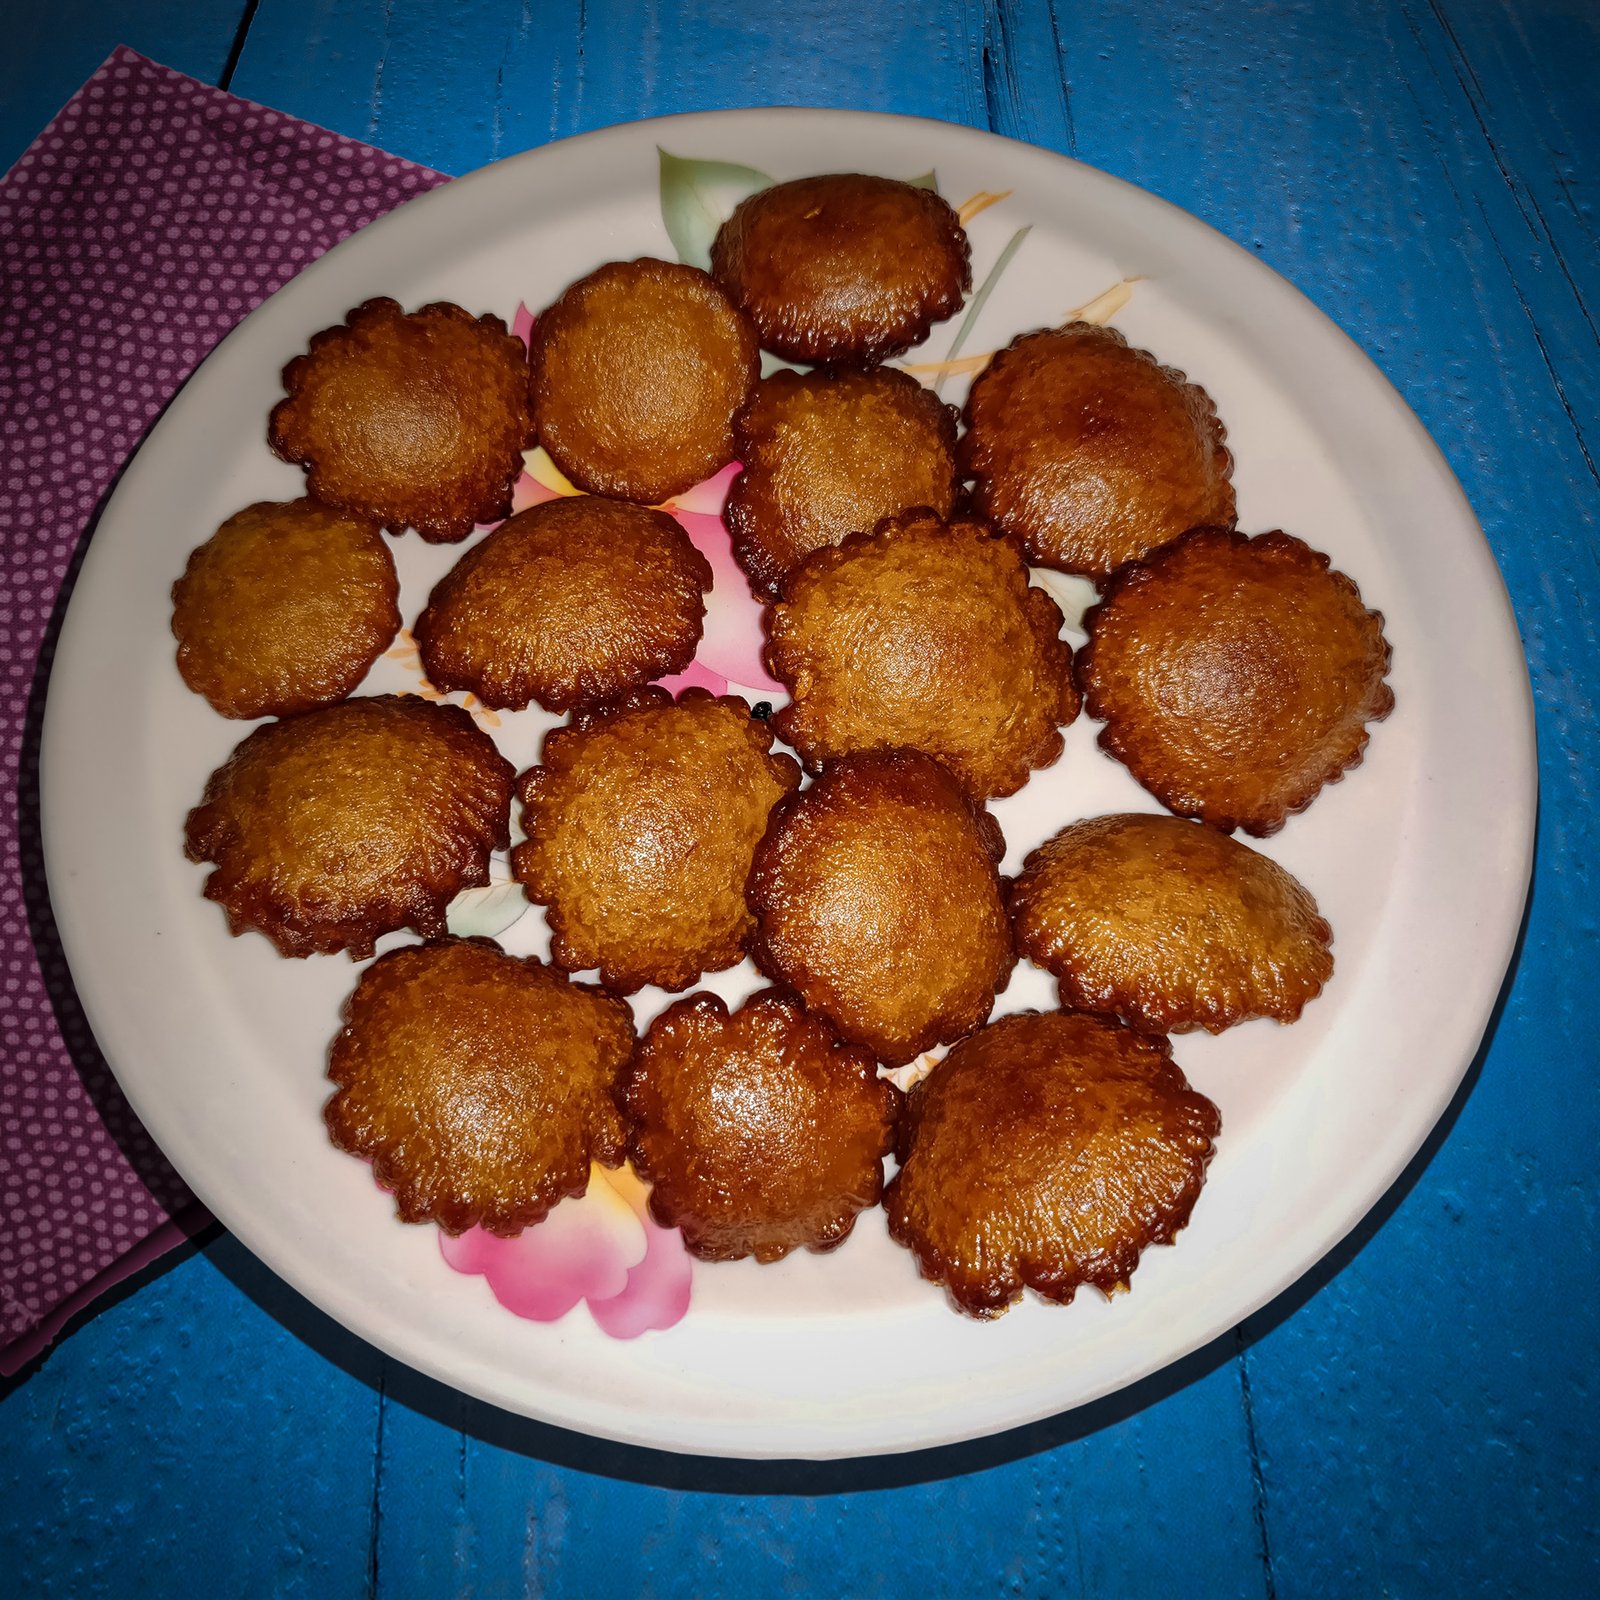
Tel pitha

Tel Pitha is a famous traditional sweet snack of Assam prepared during the festive occasion of Bihu like Magh Bihu and Bohag Bihu. It is an essential part of the Assamese Bihu Platter. Tel pitha is also prepared as a regular household snack and served with tea. It takes very minimal ingredients. The ingredients present in this authentic dish are rice flour, jaggery, all-purpose flour and oil. First, mix all the ingredients together with some water and deep fry them until there is an appearance of brown colour on it. You can eat it hot or at room temperature. It stays fresh for 2-3 weeks easily in freeze. Tel pitha is also known as Ghila Pitha. ‘Tel’ is an assamese word, which means ‘oil’.

How to make Tel Pitha

  • In a mixing bowl, mix 2 cups of rice flour, 2 tsps all-purpose flour, ½ cup melted jaggery, ¼ tsp salt, ¼ tsp baking soda, 1 tsp fennel seeds/saunf, water together very well and make a thick batter, it should not be watery.
  • Take a deep pan or kadai and heat enough oil to deep fry.
  • Take a deep round spoon and add batter to the oil and fry round pithas from it.
  • Fry them well from both sides till they become golden brown.
  • serve them with tea.
Print
Tel pitha

Assamese Tel Pitha

  • Author: admin
  • Prep Time: 10 MINUTES
  • Cook Time: 25 MINUTES
  • Total Time: 35 minutes
  • Cuisine: ASSAMESE

Scale

Ingredients

  • 2 cups of rice flour
  • 2 tsp maida/all-purpose flour
  • ¼ tsp salt
  • ¼ tsp baking soda
  • 1 tsp fennel seeds/saunf
  • ½ cup melted jaggery
  • water
  • oil to deep fry

Instructions

  1. In a mixing bowl, mix all the ingredients together very well and make a thick batter, it should not be watery.
  2. Take a deep pan or kadai and heat enough oil to deep fry.
  3. Take a deep round spoon and add batter to the oil and fry round pithas from it.
  4. Fry them well from both sides till they become golden brown.
  5. serve them with tea.

Notes

  • You can also add desiccated or fresh coconut to this recipe.

Nutrition

  • Serving Size: 2 Pieces
  • Calories: 145.1
  • Sugar: 0.0 g
  • Sodium: 104.8 mg
  • Fat: 0.4 g
  • Saturated Fat: 0.1 g
  • Carbohydrates: 27.6 g
  • Fiber: 0.9 g
  • Protein: 2.2 g

Keywords: Pitha

Eggless Pancake Recipe

0
Eggless Pancakes

How to make Eggless Pancake

  • In a large mixing bowl take 2 cups maida, 1/2 cup sugar, 1/4 tsp baking soda, 1 tsp baking powder and mix well combining all the dry ingredients.
  • Further add 1 cup milk, water, 1tsp vanilla essence, 1 tsp vinegar, 1/4 cup oil and make smooth flowing consistency batter.
  • Heat a nonstick pan and pour a ladleful of prepared pancake batter.
  • Simmer and cook until bubbles appear on the surface.
  • Flip over the pancake and simmer for 1 minute.
  • Serve eggless pancakes with honey or chocolate syrup.
Print
Eggless Pancakes

Eggless Pancakes

  • Author: admin
  • Prep Time: 5 MINUTES
  • Cook Time: 20 MINUTES
  • Total Time: 25 minutes

Scale

Ingredients

  • 2 cups maida/all-purpose flour
  • ½ cup of sugar
  • ¼ tsp baking soda
  • 1 tsp baking powder
  • 1 tsp vanilla essence
  • 1 cup milk
  • ¾ cup of water
  • 1 tsp vinegar
  • ¼ cup oil
  • chocolate syrup for serving

Instructions

  1. In a large mixing bowl take 2 cups maida, 1/2 cup sugar, 1/4 tsp baking soda, 1 tsp baking powder and mix well combining all the dry ingredients.
  2. Further add 1 cup milk, water, 1tsp vanilla essence, 1 tsp vinegar, 1/4 cup oil and make smooth flowing consistency batter.
  3. Heat a nonstick pan and pour a ladleful of prepared pancake batter.
  4. Simmer and cook until bubbles appear on the surface.
  5. Flip over the pancake and simmer for 1 minute.
  6. Serve eggless pancakes with honey or chocolate syrup.


Nutrition

  • Calories: 280.0
  • Sugar: 18.7 g
  • Sodium: 17.2 mg
  • Fat: 9.1 g
  • Saturated Fat: 1.4 g
  • Carbohydrates: 48.0 g
  • Fiber: 1.3 g
  • Protein: 5.4 g
  • Cholesterol: 0.8 mg

Dhekia Bhaji | Fiddlehead fern Fry Recipe

0

Fiddlehead fern fry is a great way to enjoy the unique flavor and nutritional benefits of this seasonal vegetable.

How to make Dhekia Bhaji or Fiddlehead fern Fry

  • Heat oil in a pan, add green chilli, cumin seeds, sliced onion, ginger garlic paste and saute till golden brown.
  • Add soaked chickpeas, turmeric powder and saute for a minute.
  • Add the chopped fiddlehead fern, salt and stir for 5 minutes
  • Now cover and cook for another 5-7 minutes.
  • Finally, add lemon juice and stir.
  • Serve with rice or roti.
Print
dhekia xaak bhaji scaled

Dhekia Bhaji | Fiddlehead fern fry

  • Author: admin
  • Prep Time: 15 MINUTES
  • Cook Time: 25 MINUTES
  • Total Time: 40 minutes
  • Diet: Vegetarian

Scale

Ingredients

  • Fiddlehead fern, chopped
  • 2 tsp oil
  • 1 green chilli
  • 1 onion, sliced
  • 1 tsp ginger garlic paste
  • ½ cup soaked chickpeas
  • ½ tsp turmeric powder
  • 1 tsp cumin seeds
  • 2 tsp lemon juice
  • salt

Instructions

  1. Heat oil in a pan, add green chilli, cumin seeds, sliced onion, ginger garlic paste and saute till golden brown.
  2. Add soaked chickpeas, turmeric powder and saute for a minute.
  3. Add the chopped fiddlehead fern, salt and stir for 5 minutes
  4. Now cover and cook for another 5-7 minutes.
  5. Finally, add lemon juice and stir.
  6. Serve with rice or roti.

Keywords: Dhekia

Lobia Masala Recipe

0
Lobia masala

Lobia masala, also known as black-eyed peas curry, is a popular and flavorful dish from the Indian subcontinent. Made with black-eyed peas, also known as lobia, this dish is a delicious and healthy option for a weeknight dinner.

To make lobia masala, start by soaking the black-eyed peas overnight. Then, cook them in a pot with water, salt, and spices such as turmeric, cumin, and ginger. Once the peas are cooked, add diced onions, tomatoes, and additional spices to create a flavorful and aromatic curry.

This dish is typically served with rice or roti and can be garnished with fresh cilantro or chopped tomatoes. The combination of creamy peas and rich spices makes for a satisfying and comforting meal.

Not only is lobia masala delicious, but it is also packed with nutrients. Black-eyed peas are a good source of protein, fiber, and iron. They are also low in fat and calories, making them a great option for those watching their weight.

There are many different variations of this recipe and you can find many different recipes online or in cookbooks, so you can experiment with different spices and ingredients to find the perfect combination that suits your taste. If you’re looking for a new and exciting recipe to try, give lobia masala a try.

How to make Lobia Masala

  • Heat 3 tsp oil in a pan and add bay leaves.
  • add chopped onion and ginger-garlic paste, saute until it turns golden.
  • add red chilli powder and turmeric and stir it.
  • add tomato puree, coriander powder, cumin powder and saute the masala until it leaves the side of the pan.
  • add boiled lobia and salt and stir it well.
  • add water and mix well and simmer on a low flame for 5 minutes.
  • after 5 minutes add garam masala and coriander leaves.
  • serve it with rice or roti.
Print
Lobia masala

Lobia Masala

  • Author: admin
  • Prep Time: 15 MINUTES
  • Cook Time: 20 MINUTES
  • Total Time: 35 minutes
  • Cuisine: INDIAN

Scale

Ingredients

  • 3 tsp oil
  • 1 onion, chopped
  • 2 bay leaves
  • 1 tsp ginger-garlic paste
  • 1 tsp red chilli powder
  • ½ tsp turmeric powder
  • 1 cup tomato puree
  • 2 cups boiled lobia/ black eye beans
  • salt
  • 1 tsp coriander powder
  • ½ tsp cumin powder
  • 1½ cups water
  • ¼ tsp garam masala
  • coriander leaves

Instructions

  1. Heat 3 tsp oil in a pan and add bay leaves.
  2. add chopped onion and ginger-garlic paste, saute until it turns golden.
  3. add red chilli powder and turmeric and stir it.
  4. add tomato puree, coriander powder, cumin powder and saute the masala until it leaves the side of the pan.
  5. add boiled lobia and salt and stir it well.
  6. add water and mix well and simmer on a low flame for 5 minutes.
  7. after 5 minutes add garam masala and coriander leaves.
  8. serve it with rice or roti.


Nutrition

  • Serving Size: 4
  • Calories: 175.6
  • Sugar: 4.0 g
  • Sodium: 599.4 mg
  • Fat: 7.9 g
  • Saturated Fat: 1.0 g
  • Carbohydrates: 22.6 g
  • Fiber: 5.2 g
  • Protein: 6.0 g
  • Cholesterol: 0.2 mg

Keywords: black eye beans

0
    0
    Your Cart
    Your cart is emptyReturn to Shop